Bluebonnets and scissortails take a while to stitch.

Bluebonnets and scissortails take a while to stitch.
This is an excellent example of a graceful inlaid and perforated (the little dots along the edges) cowboy boot top band.

Here’s a little peek at the process of assembling an inlay/overlay design. A design this complex requires much thought about how the pieces will be shaped, which parts will go over and which will go under, and what order they’ll need to be put into place. It’s always fun when you turn it over and see that all the small oddly-shaped bits have come together to create the picture you intended. Stitching will link the floating flowers and leaves, and add the final details to the scissor tail bird.


Soon we’ll find out if all of these oddly-shaped little pieces will come together to make flowers and birds.

I’ve just uploaded a new YouTube video, inspired by my realization of how I love watching the hands of a craftsperson when they’re doing their work. There’s a graceful, casual assurance present in the hands of someone who’s experienced at their craft. (Probably there’s also arthritis, but that’s another story.) So anyway, if you’d like to step into my shop and watch me work for a few minutes, here’s a video link.
I don’t necessarily look forward to punching hundreds of tiny holes by hand one-at-a-time, but I sure love the way it looks along an edge! When you punch holes along an edge in shoe making it’s called Brogueing, but when you punch holes along the edge in cowboy boot making it’s called Perforations.
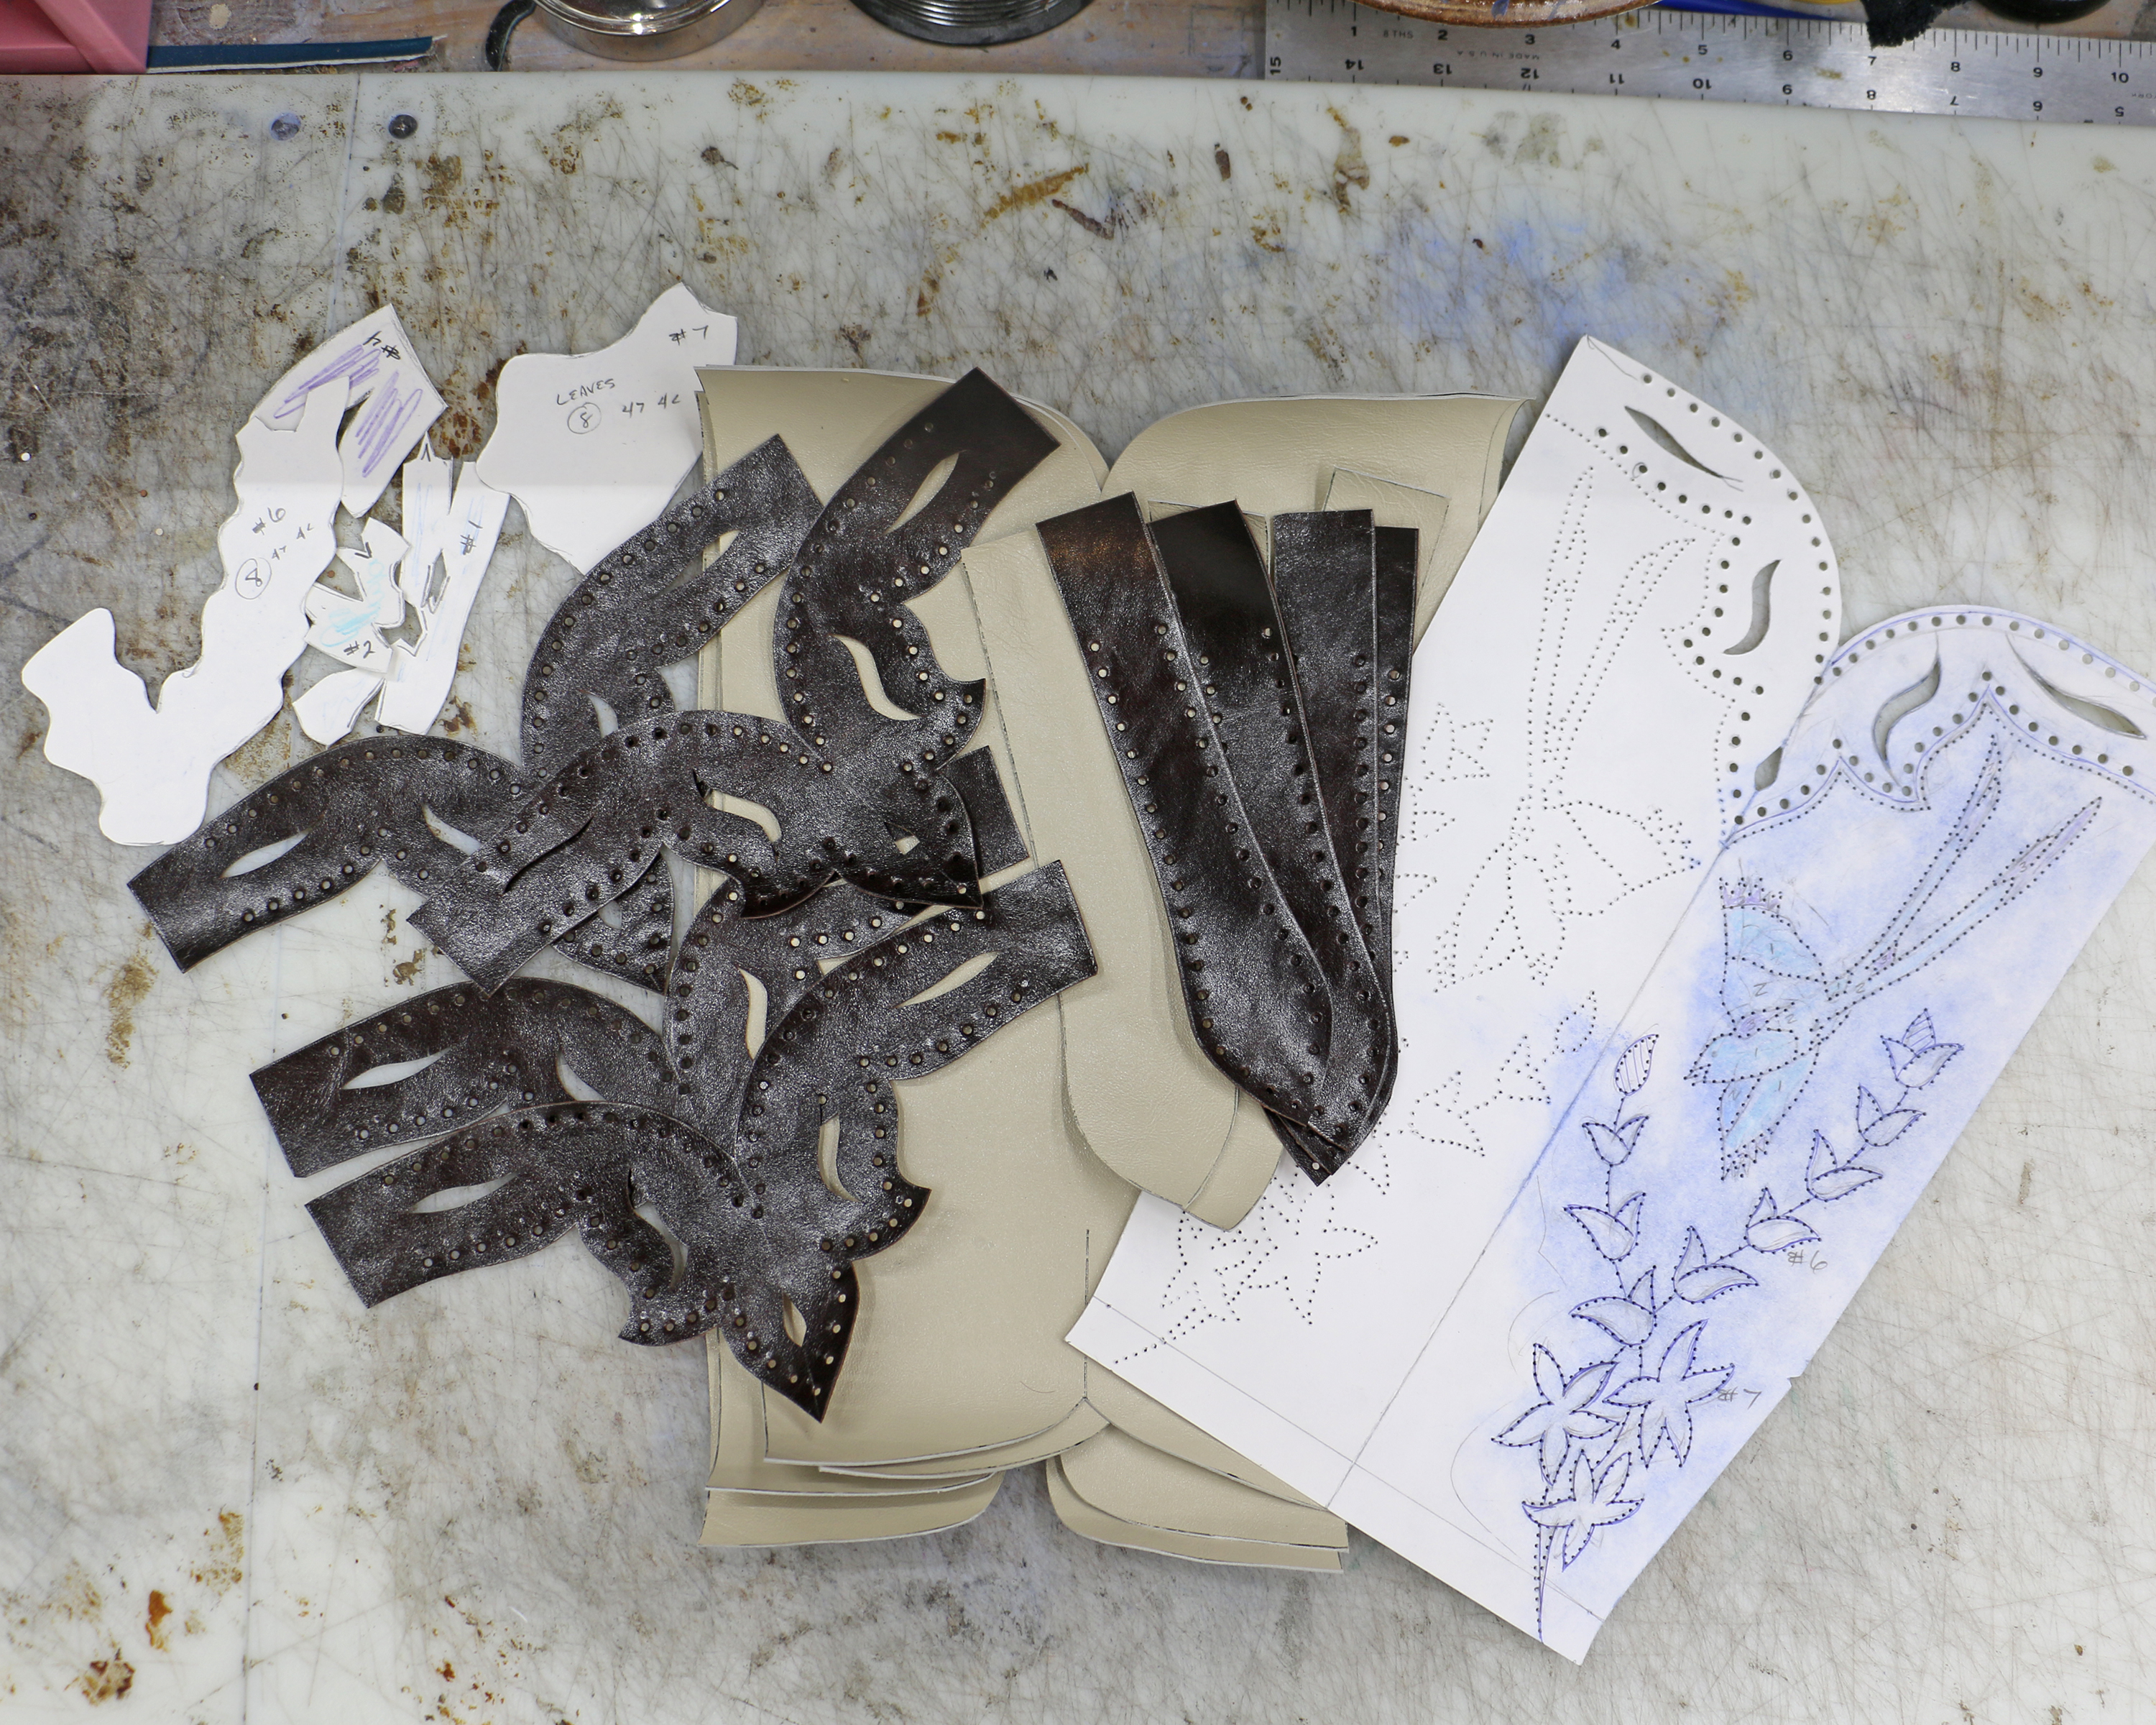
New design for a pair of boots honoring both Oklahoma (scissortail bird) and Texas (bluebonnets)

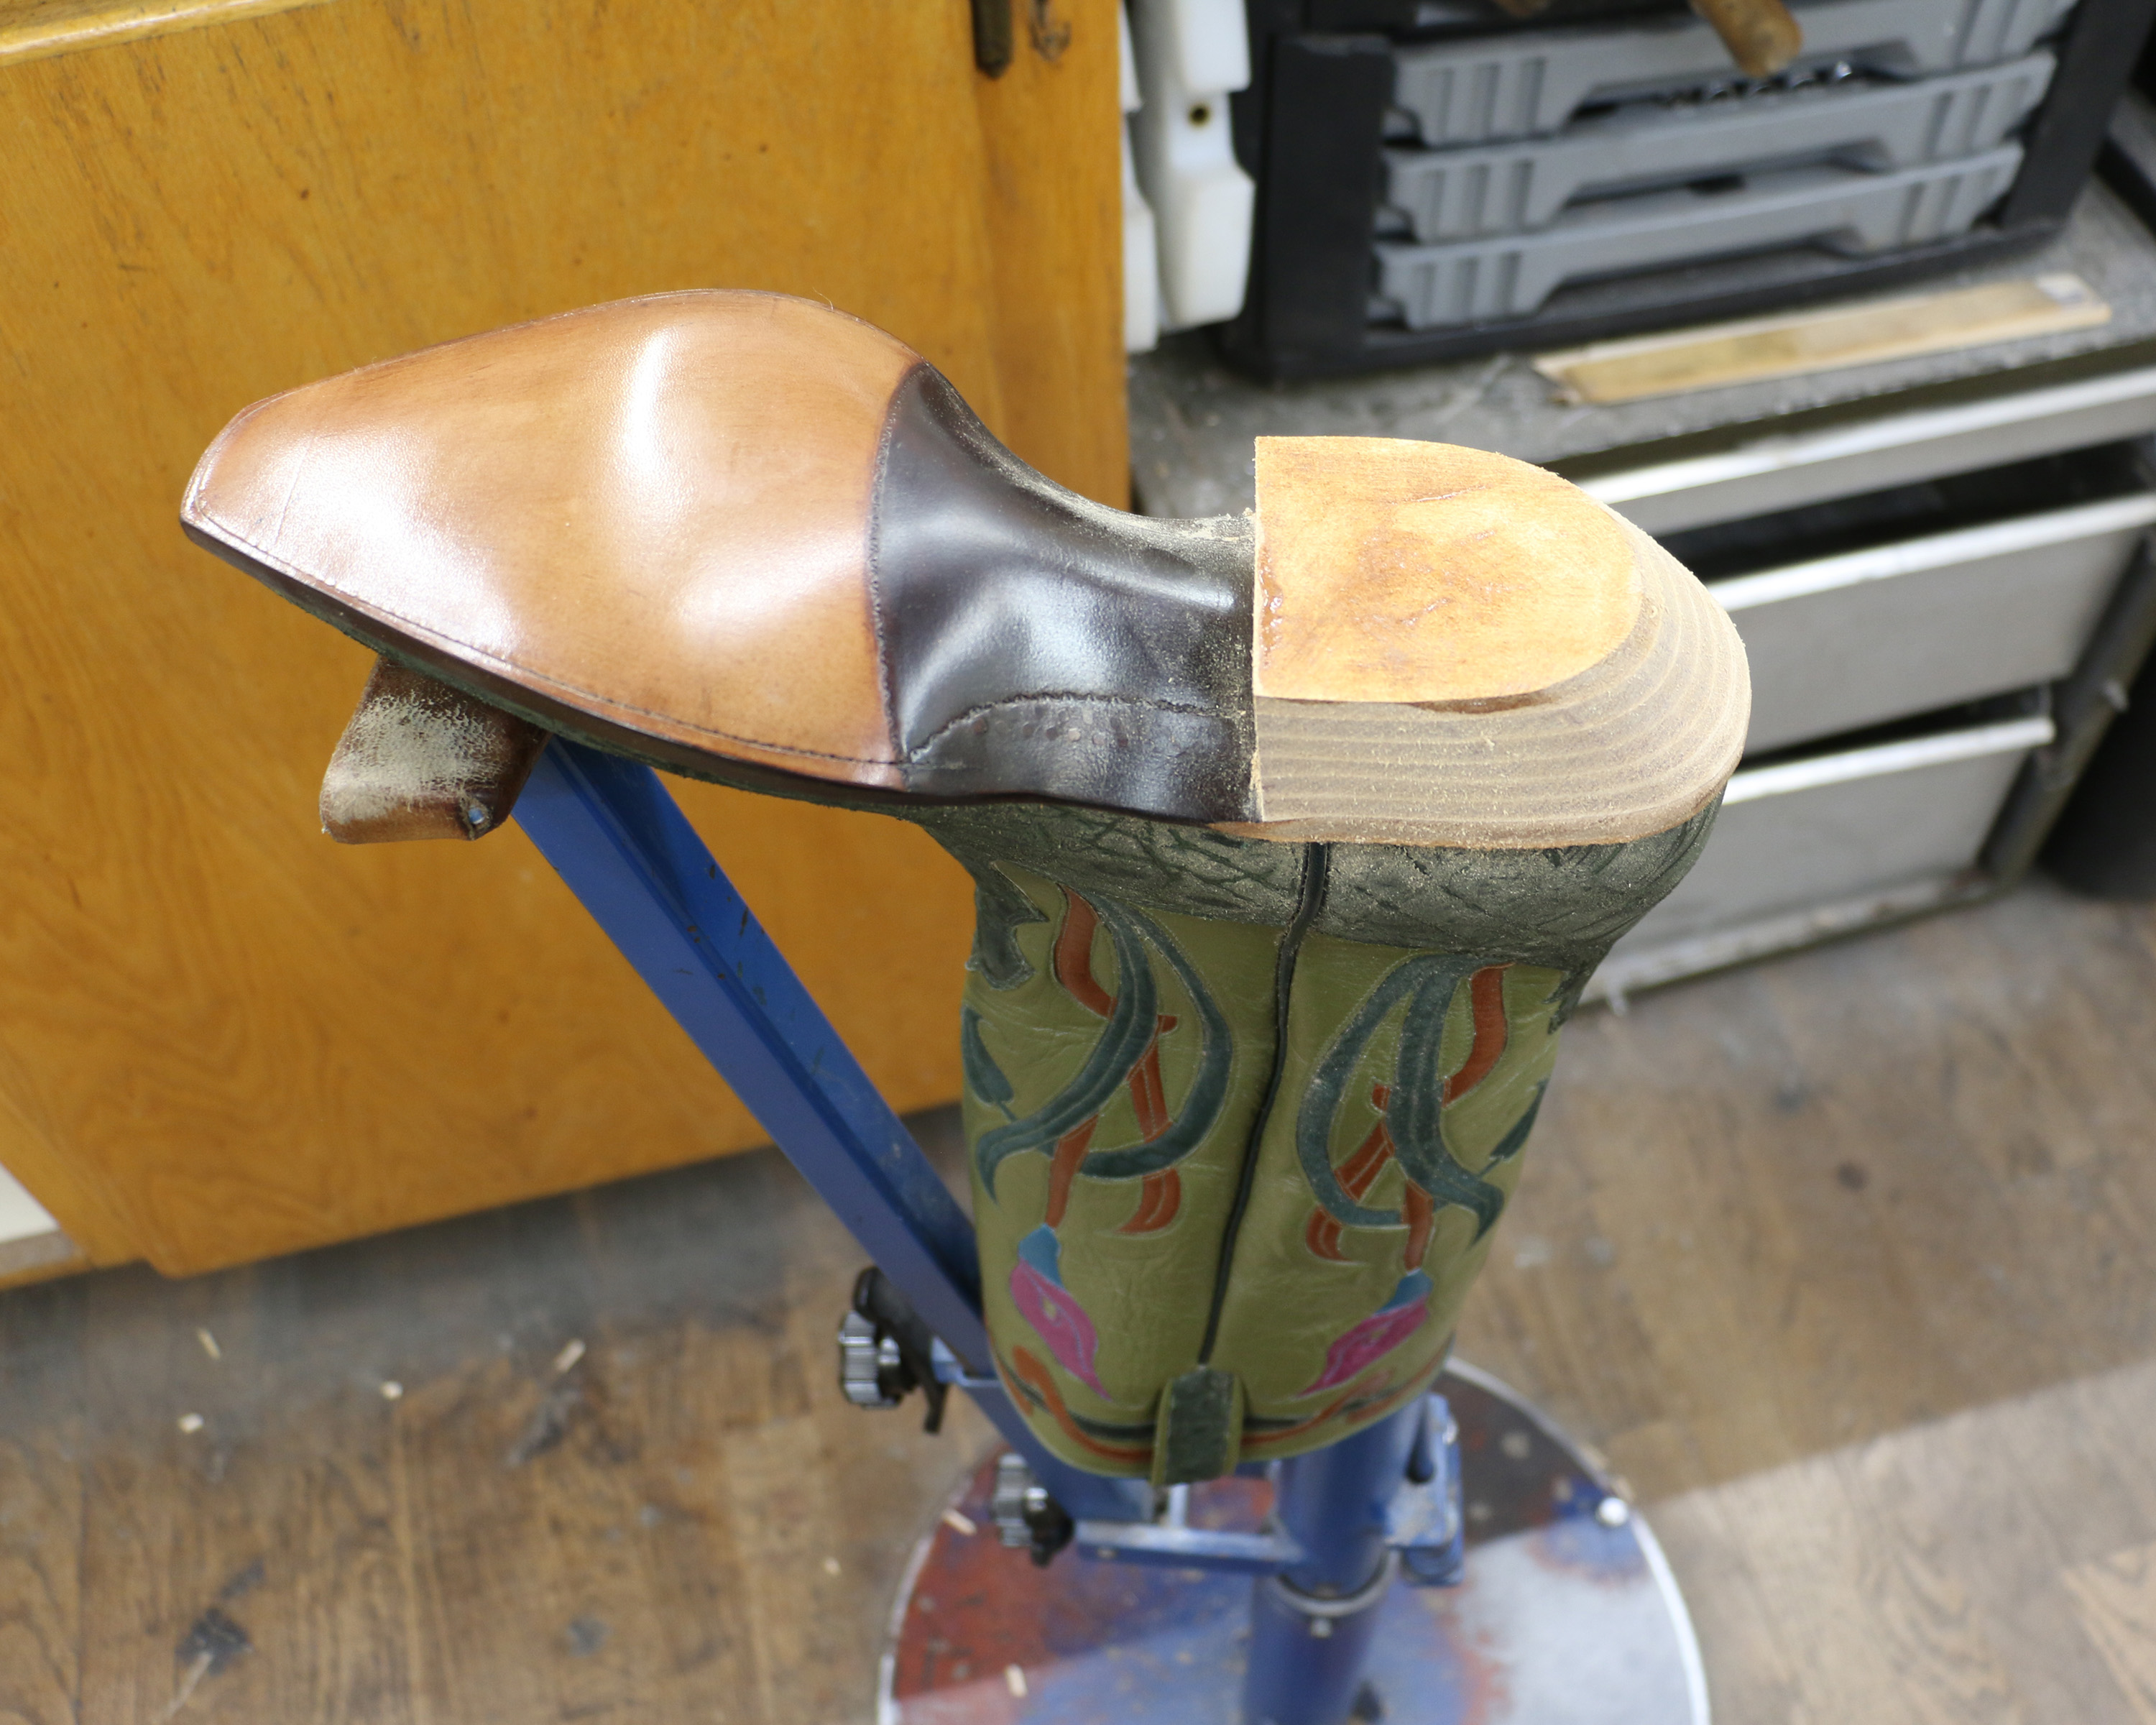
I am pleased to report that I was able to get the lasts out of these boots today!

After I’ve built the heels to the correct height, I add the rubber heel cap. Next I pull the lasts out so I can do the final heel shaping.
Or… I try very hard to get the lasts out, fail miserably, stop before I exhaust myself too much, spray water down inside the boots, and wait until tomorrow to try again. Putting water on the pegs makes them swell up and hold tighter, but when they dry completely they’ll become brittle and ideally they will break off and allow me to pull the last out. Send me good wishes for tomorrow.

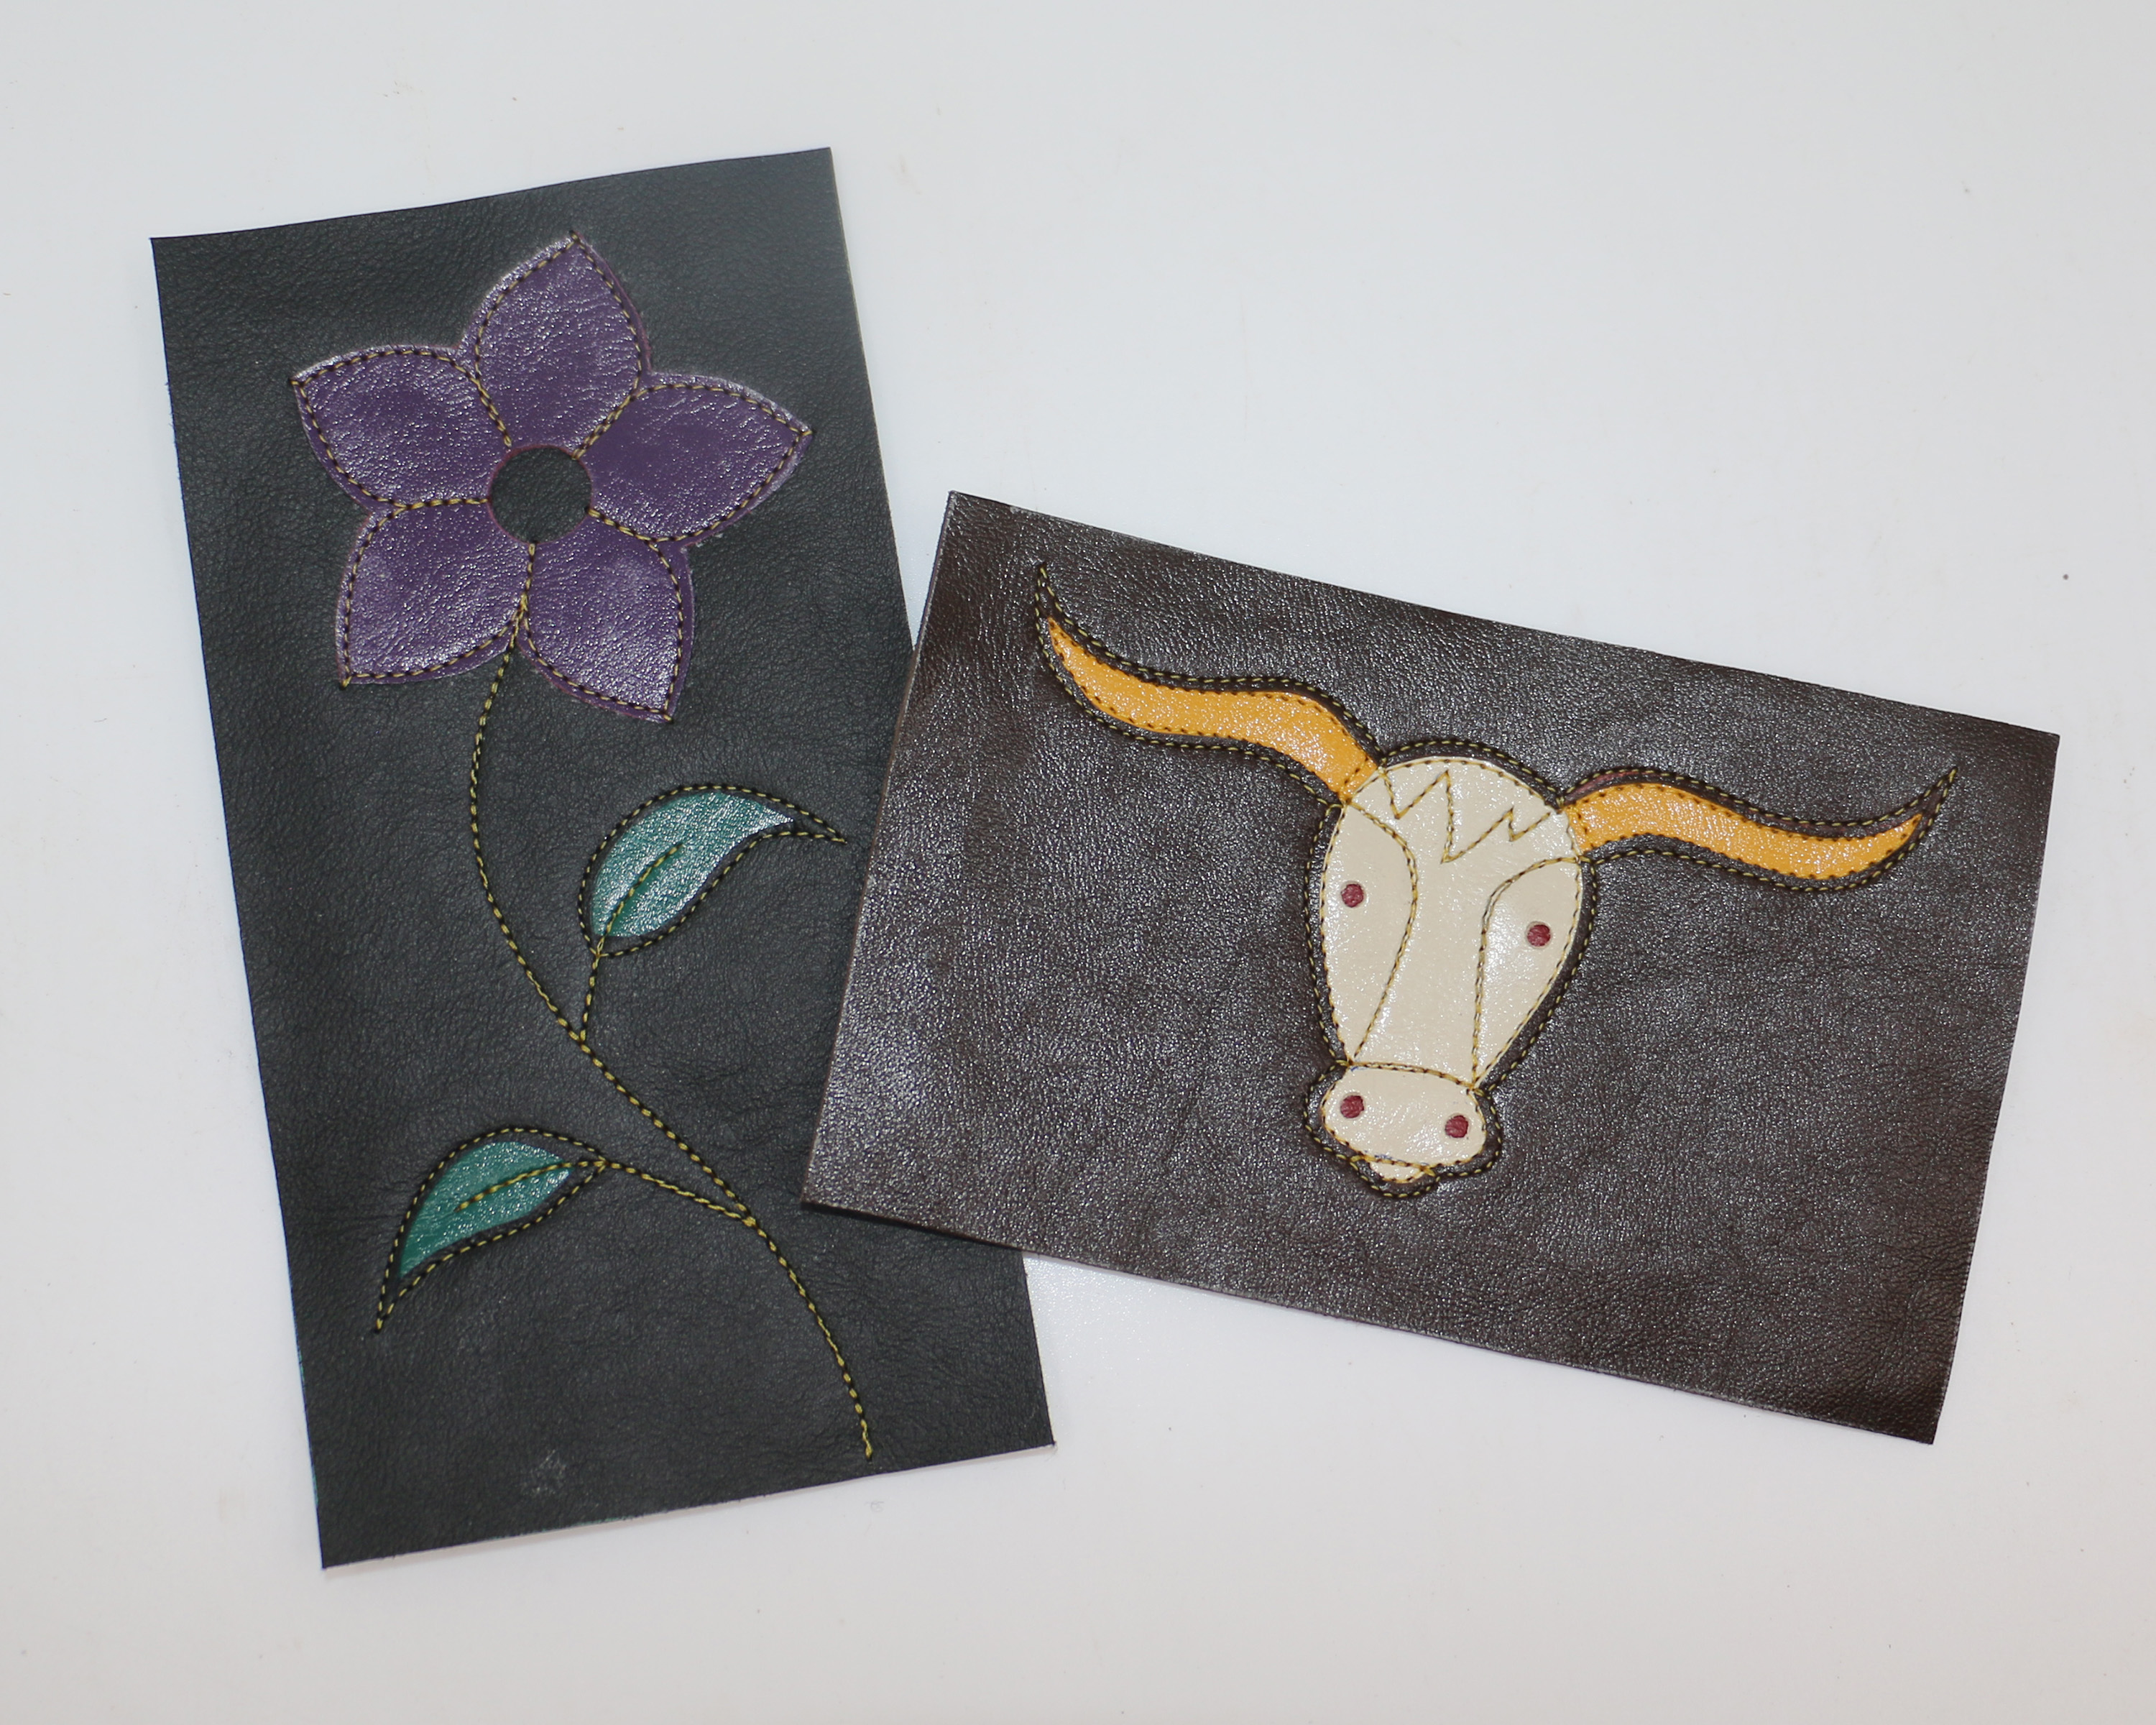
Friday afternoon at my shop I taught a two hour class for ten students and their instructors, from a college costume design course in Oklahoma City. That’s a whole lot of people to try and teach how to cut and skive in a very short time, but they all finished their projects. Each of them made two little patches — one with an overlaid flower and inlaid leaves, and one with an inlaid steer head. I didn’t get pictures because I was too busy, but they all seemed happy when they left. The instructors asked how often I taught classes like this and I had to admit that I do not ever and they must have asked me on a day when I was feeling unusually agreeable.
I’ve attached a photo of the two projects, done by me. I was getting ready to make mine before the class to show as examples, when I realized that both pieces were so simple it would be better to demonstrate them instead. That way, instead of explaining cutting and skiving in words, I could actually show them the techniques as I made the pieces.
I can’t also teach sewing skills in a class that brief so I sewed everyone’s project. I often do all the sewing in a class like that and sewing twenty inlay projects as quickly as I possibly can while they all stand in line waiting is stressful. I tend to imagine that everyone is impatiently waiting, which no one seemed to be. One of them even said they were enjoying watching me sew really fast. They asked if it made me nervous or less accurate to talk or answer questions while sewing, and that was an amusing thought. Sewing is like breathing to me and my brain doesn’t have to be fully engaged with it.
LOL, I just realized that yesterday I was watching a musician sing while beautifully playing a guitar and that looks incredibly difficult to me. But I can sing (or talk) and sew something complex at the same time and it’s easy.
| 118. Crafting Cowboy… on Jay Griffith | |
| customboots on Inspiration | |
| gleaming00e65375c7 on Inspiration | |
| Olivia Henson on All through sewing | |
| customboots on So many rows |
