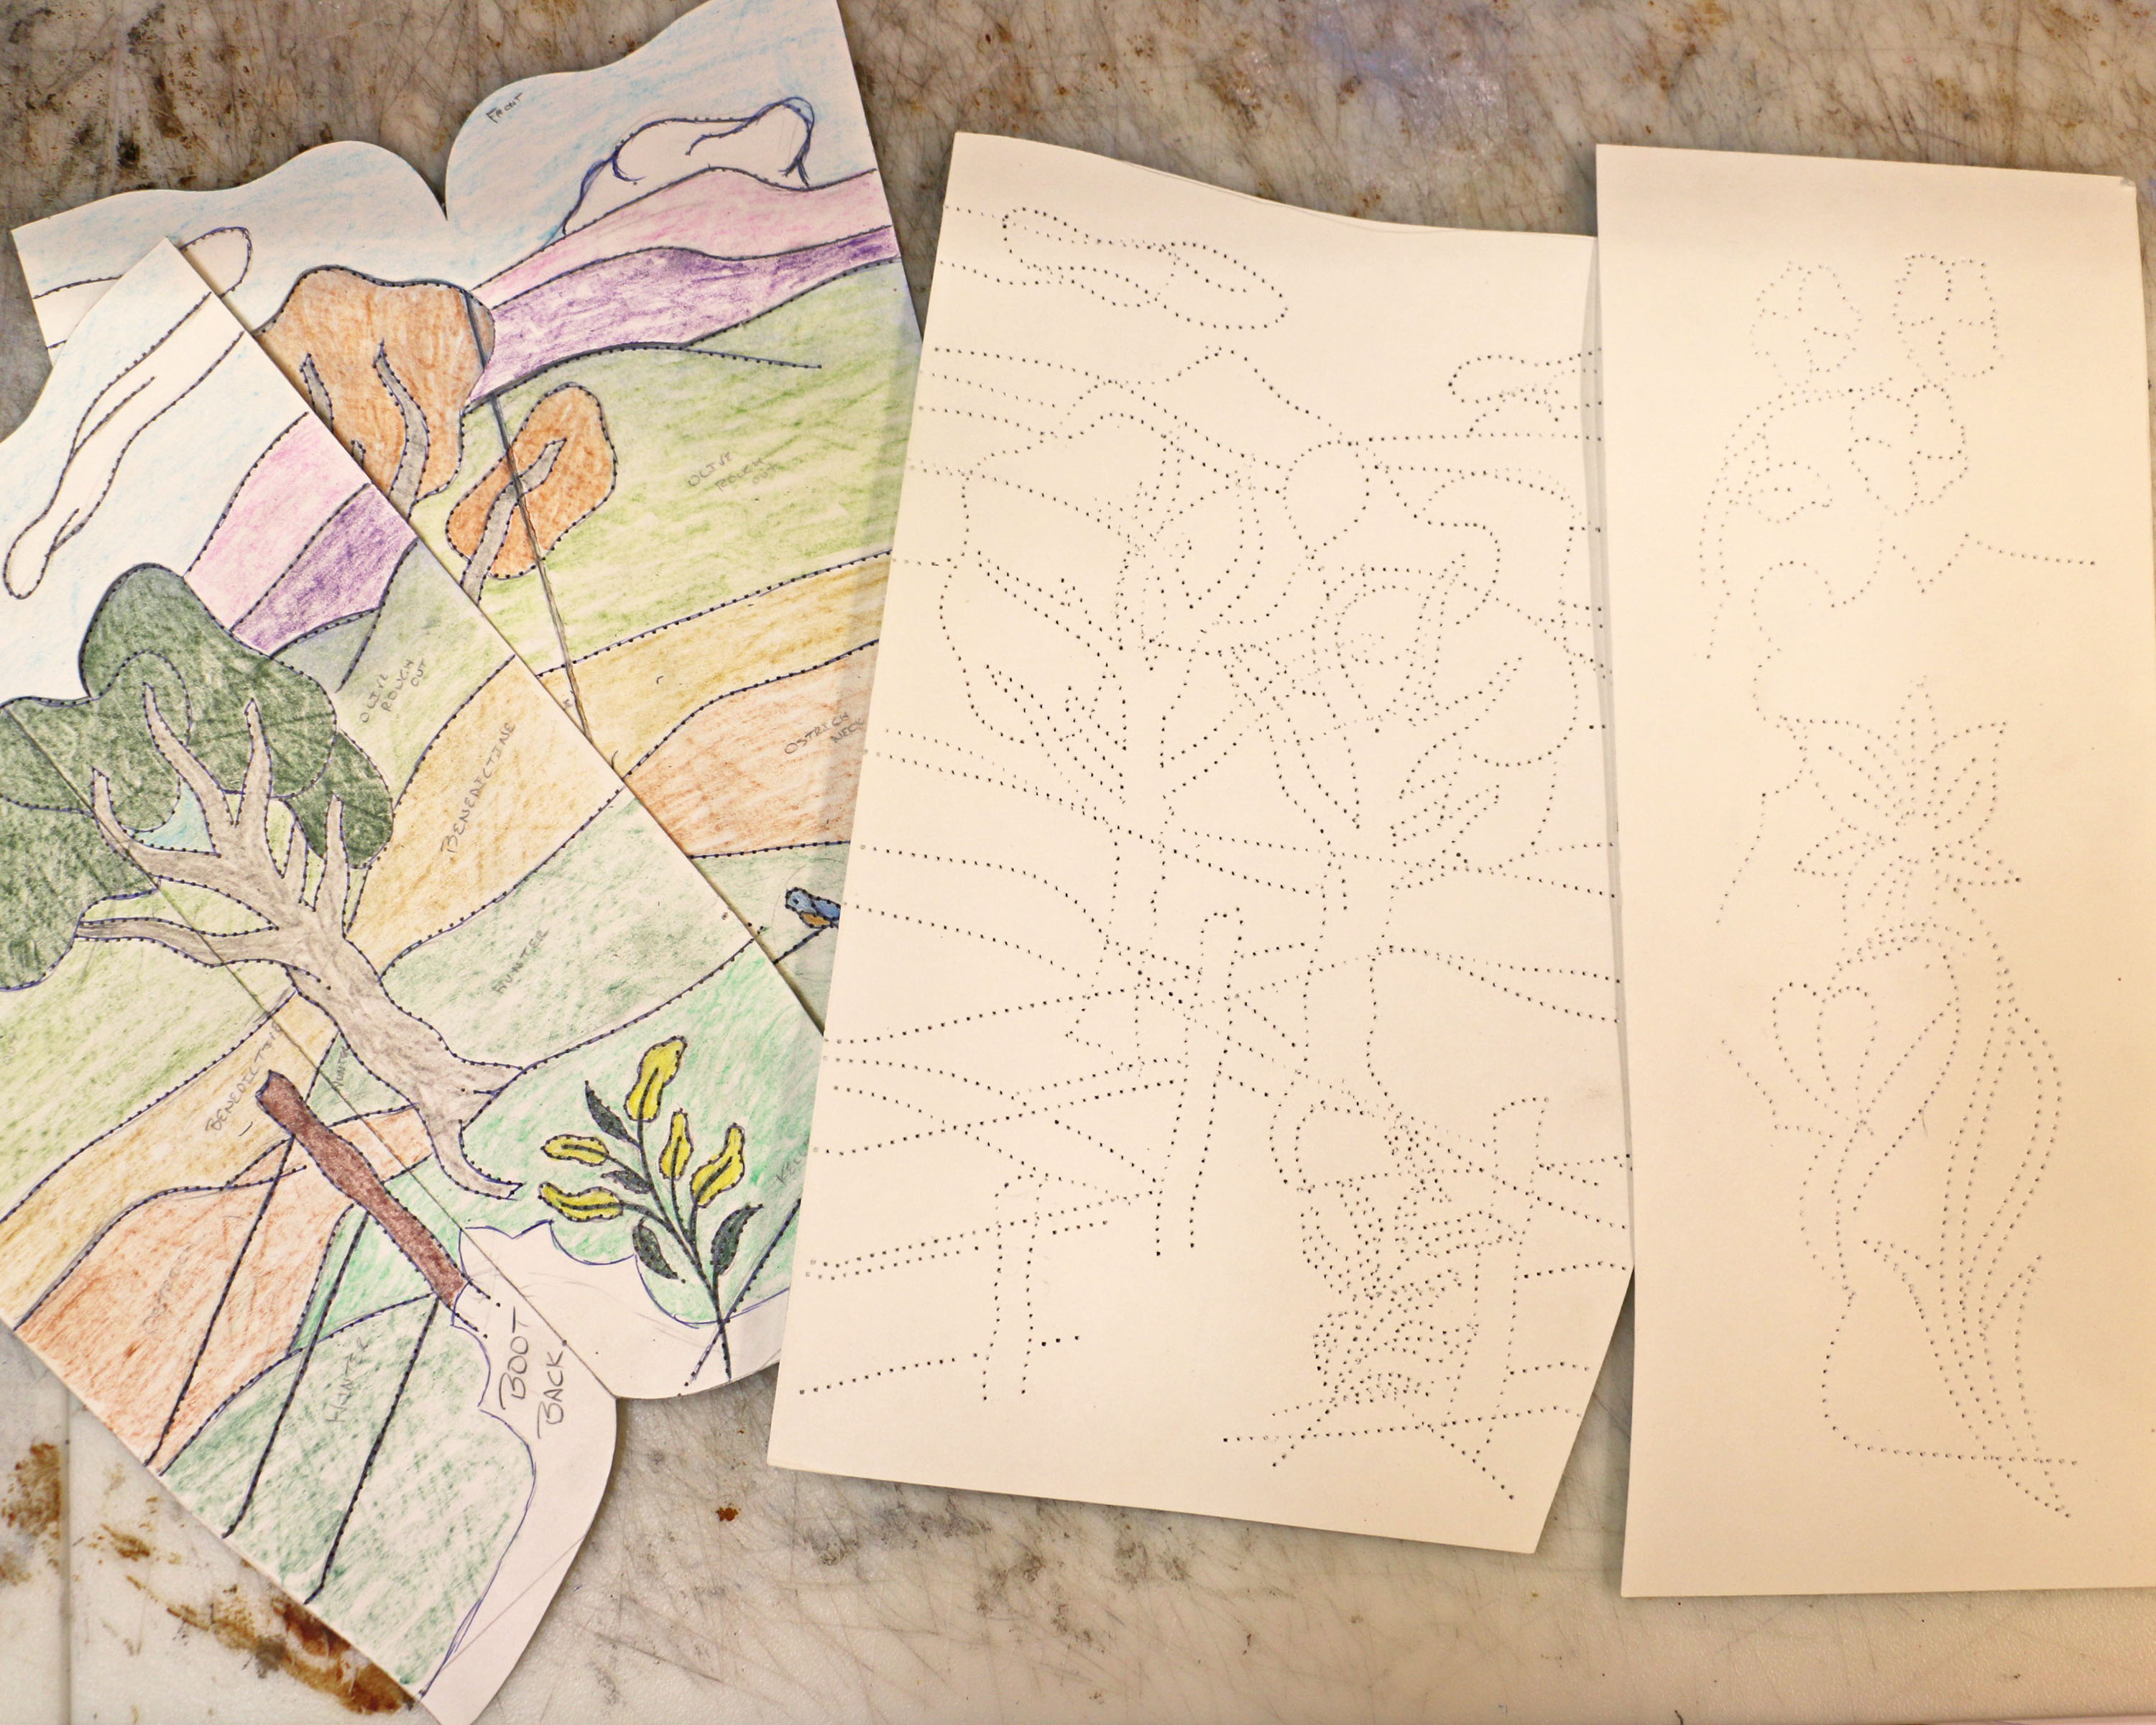
I create my pattern design templates by stitching the poster board with no thread in the needle. The holes will close if you don’t have an extra piece of poster board behind the pattern template as you’re sewing. The backing pieces can be reused multiple times and after a while they become their own sort of art (right before I throw them away, that is).
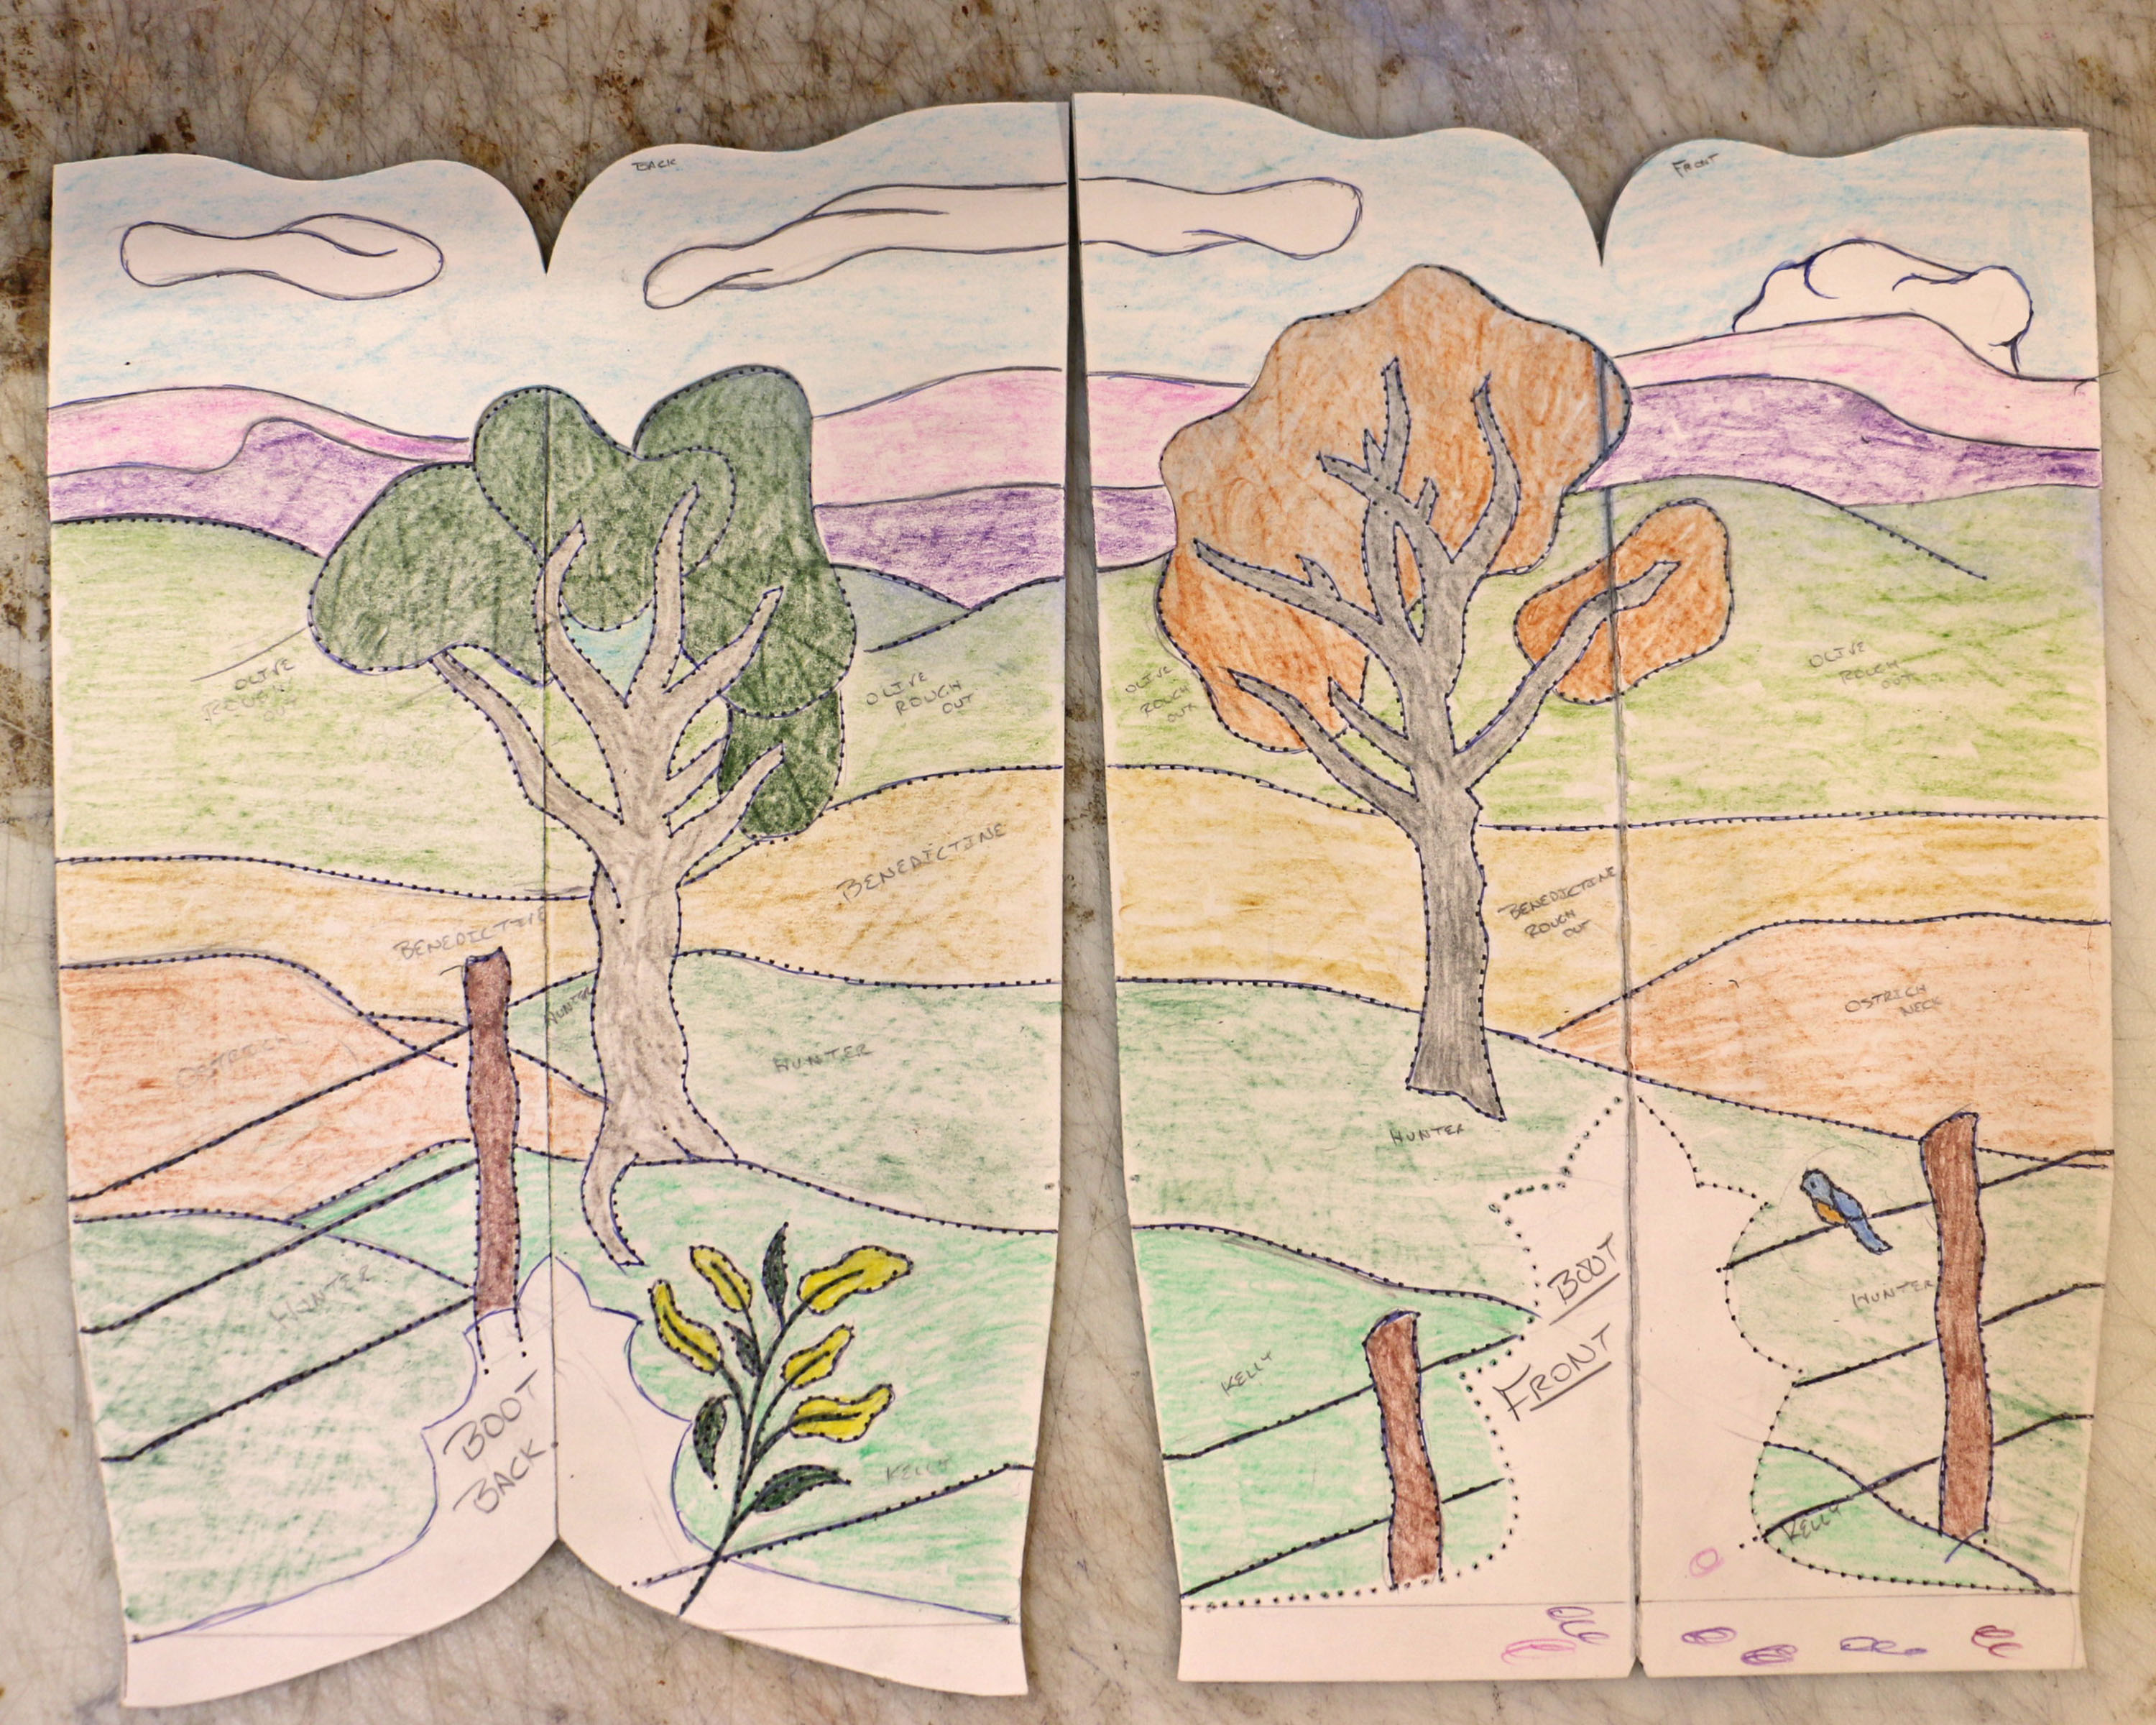
The client for the boots with a landscape top approved the design conditionally but requested the addition of some purple in the sky. This is why I enjoy doing custom designs and working with customers — I learn from them and my work gets better!
Holding the template to cut the tongue reminded me of working for Jay Griffith, my first mentor. We cut boot tongues with a cutting die and a clicker. The clicking machine has a large flat beam that snaps down and smashes the sharp die through the leather, cutting it to shape. The tricky thing about cutting tongues is that the vamp (foot part) relaxes slightly after being crimped (stretched to shape). You have to pull it back into shape and hold it as you mark the pattern, which is what I’m doing here. When using the clicker, Jay encouraged me to hold the leather up under the clicker beam. He said, “Just keep your fingers flat and you’ll be fine!” (This is not an OSHA approved method, believe me.) And since he had disabled the safety on the clicker which would have required both hands outside the machine, and furthermore since I was young and too dumb to argue, I stuck my fingers up in there next to the die, carefully kept them flat, and managed to avoid either smashing all my fingers flat or cutting them off.
Because of my training with a clicker die, I’m accustomed to cutting the tongue shape with the vamp folded flat. I believe some boot makers open the tongue area and cut each side individually, but I glue the leather together and cut both sides at once. The secret is to have a very sharp knife and to carefully hold it straight up and down. If you hold the knife at an angle, one side will be smaller and narrower than the other.
I’m going to share this photo of a pair of boots I made for my son and then I’ll be out of my shop for the rest of the week. A family friend in West Virginia has died and I promised my mother I’d take her to the funeral when the day came.
This particular boot design is titled “Somewhere Between Right and Wrong” and I will admit that this pair skews very far towards wrong. If there was a mistake I could make, I made it. They do appear to be wearable and my son is forgiving, but goodness, I hope I do better the next time I try to pretend I’m a shoe maker.
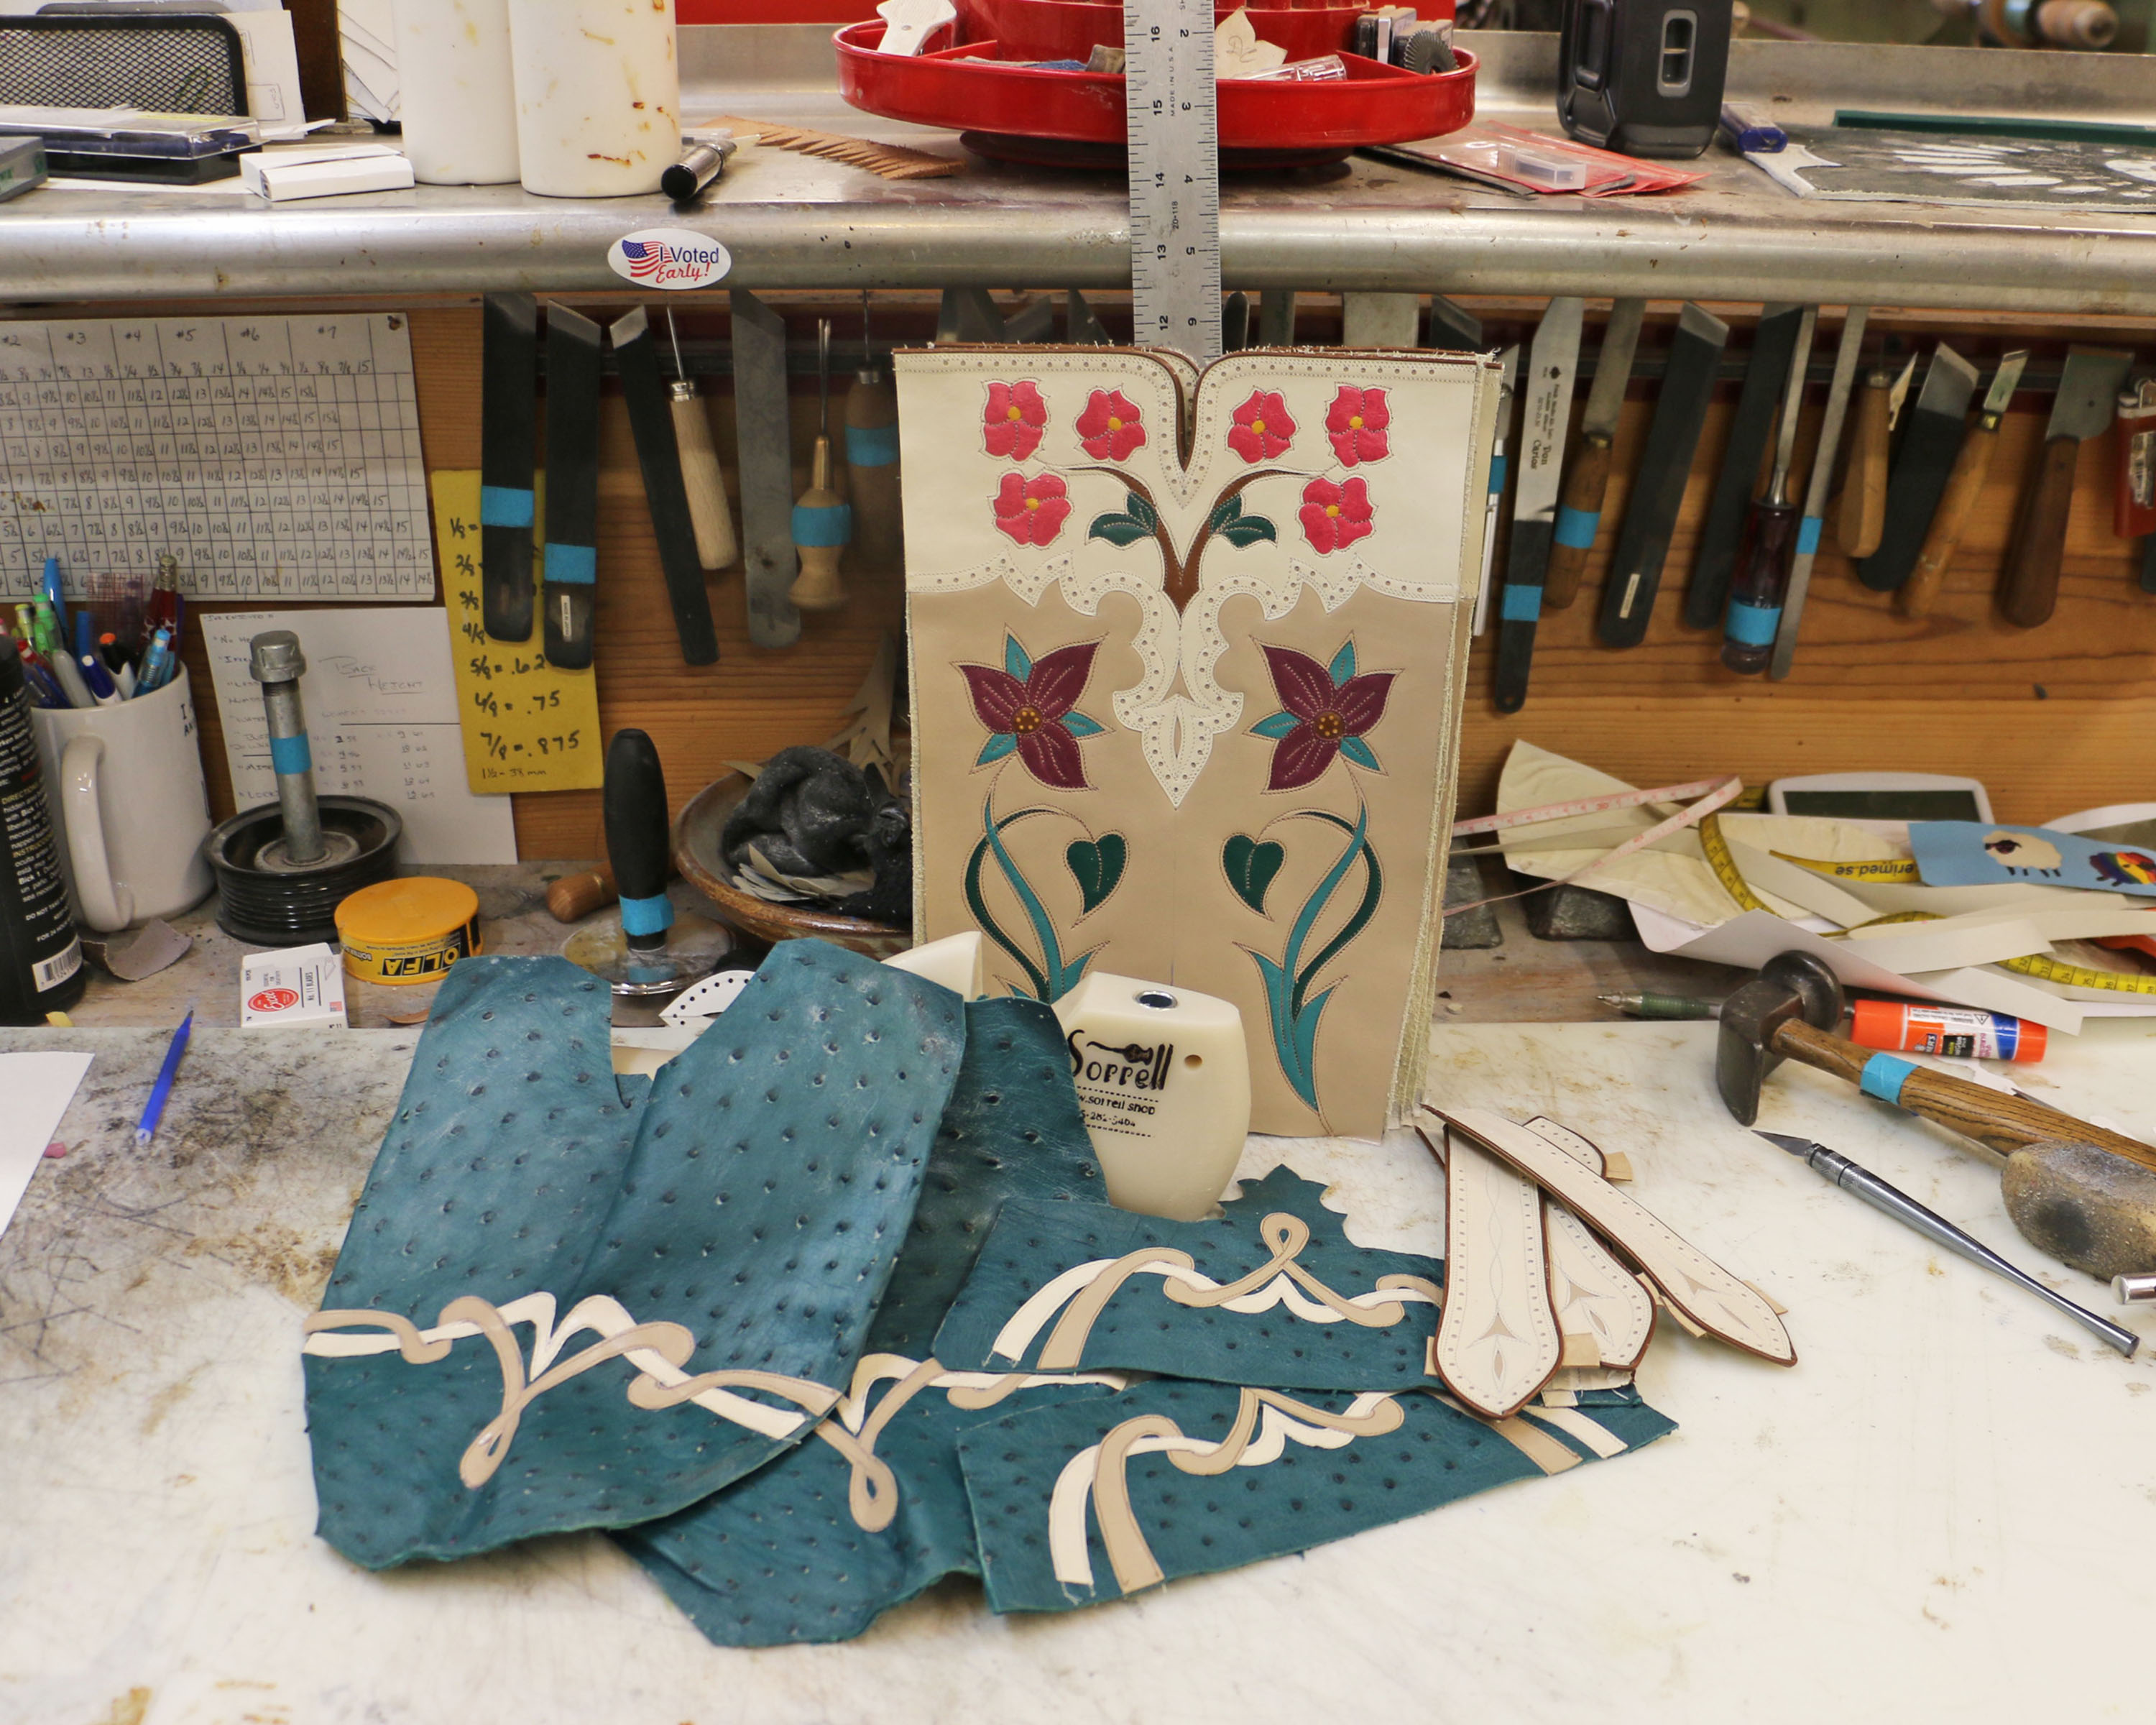
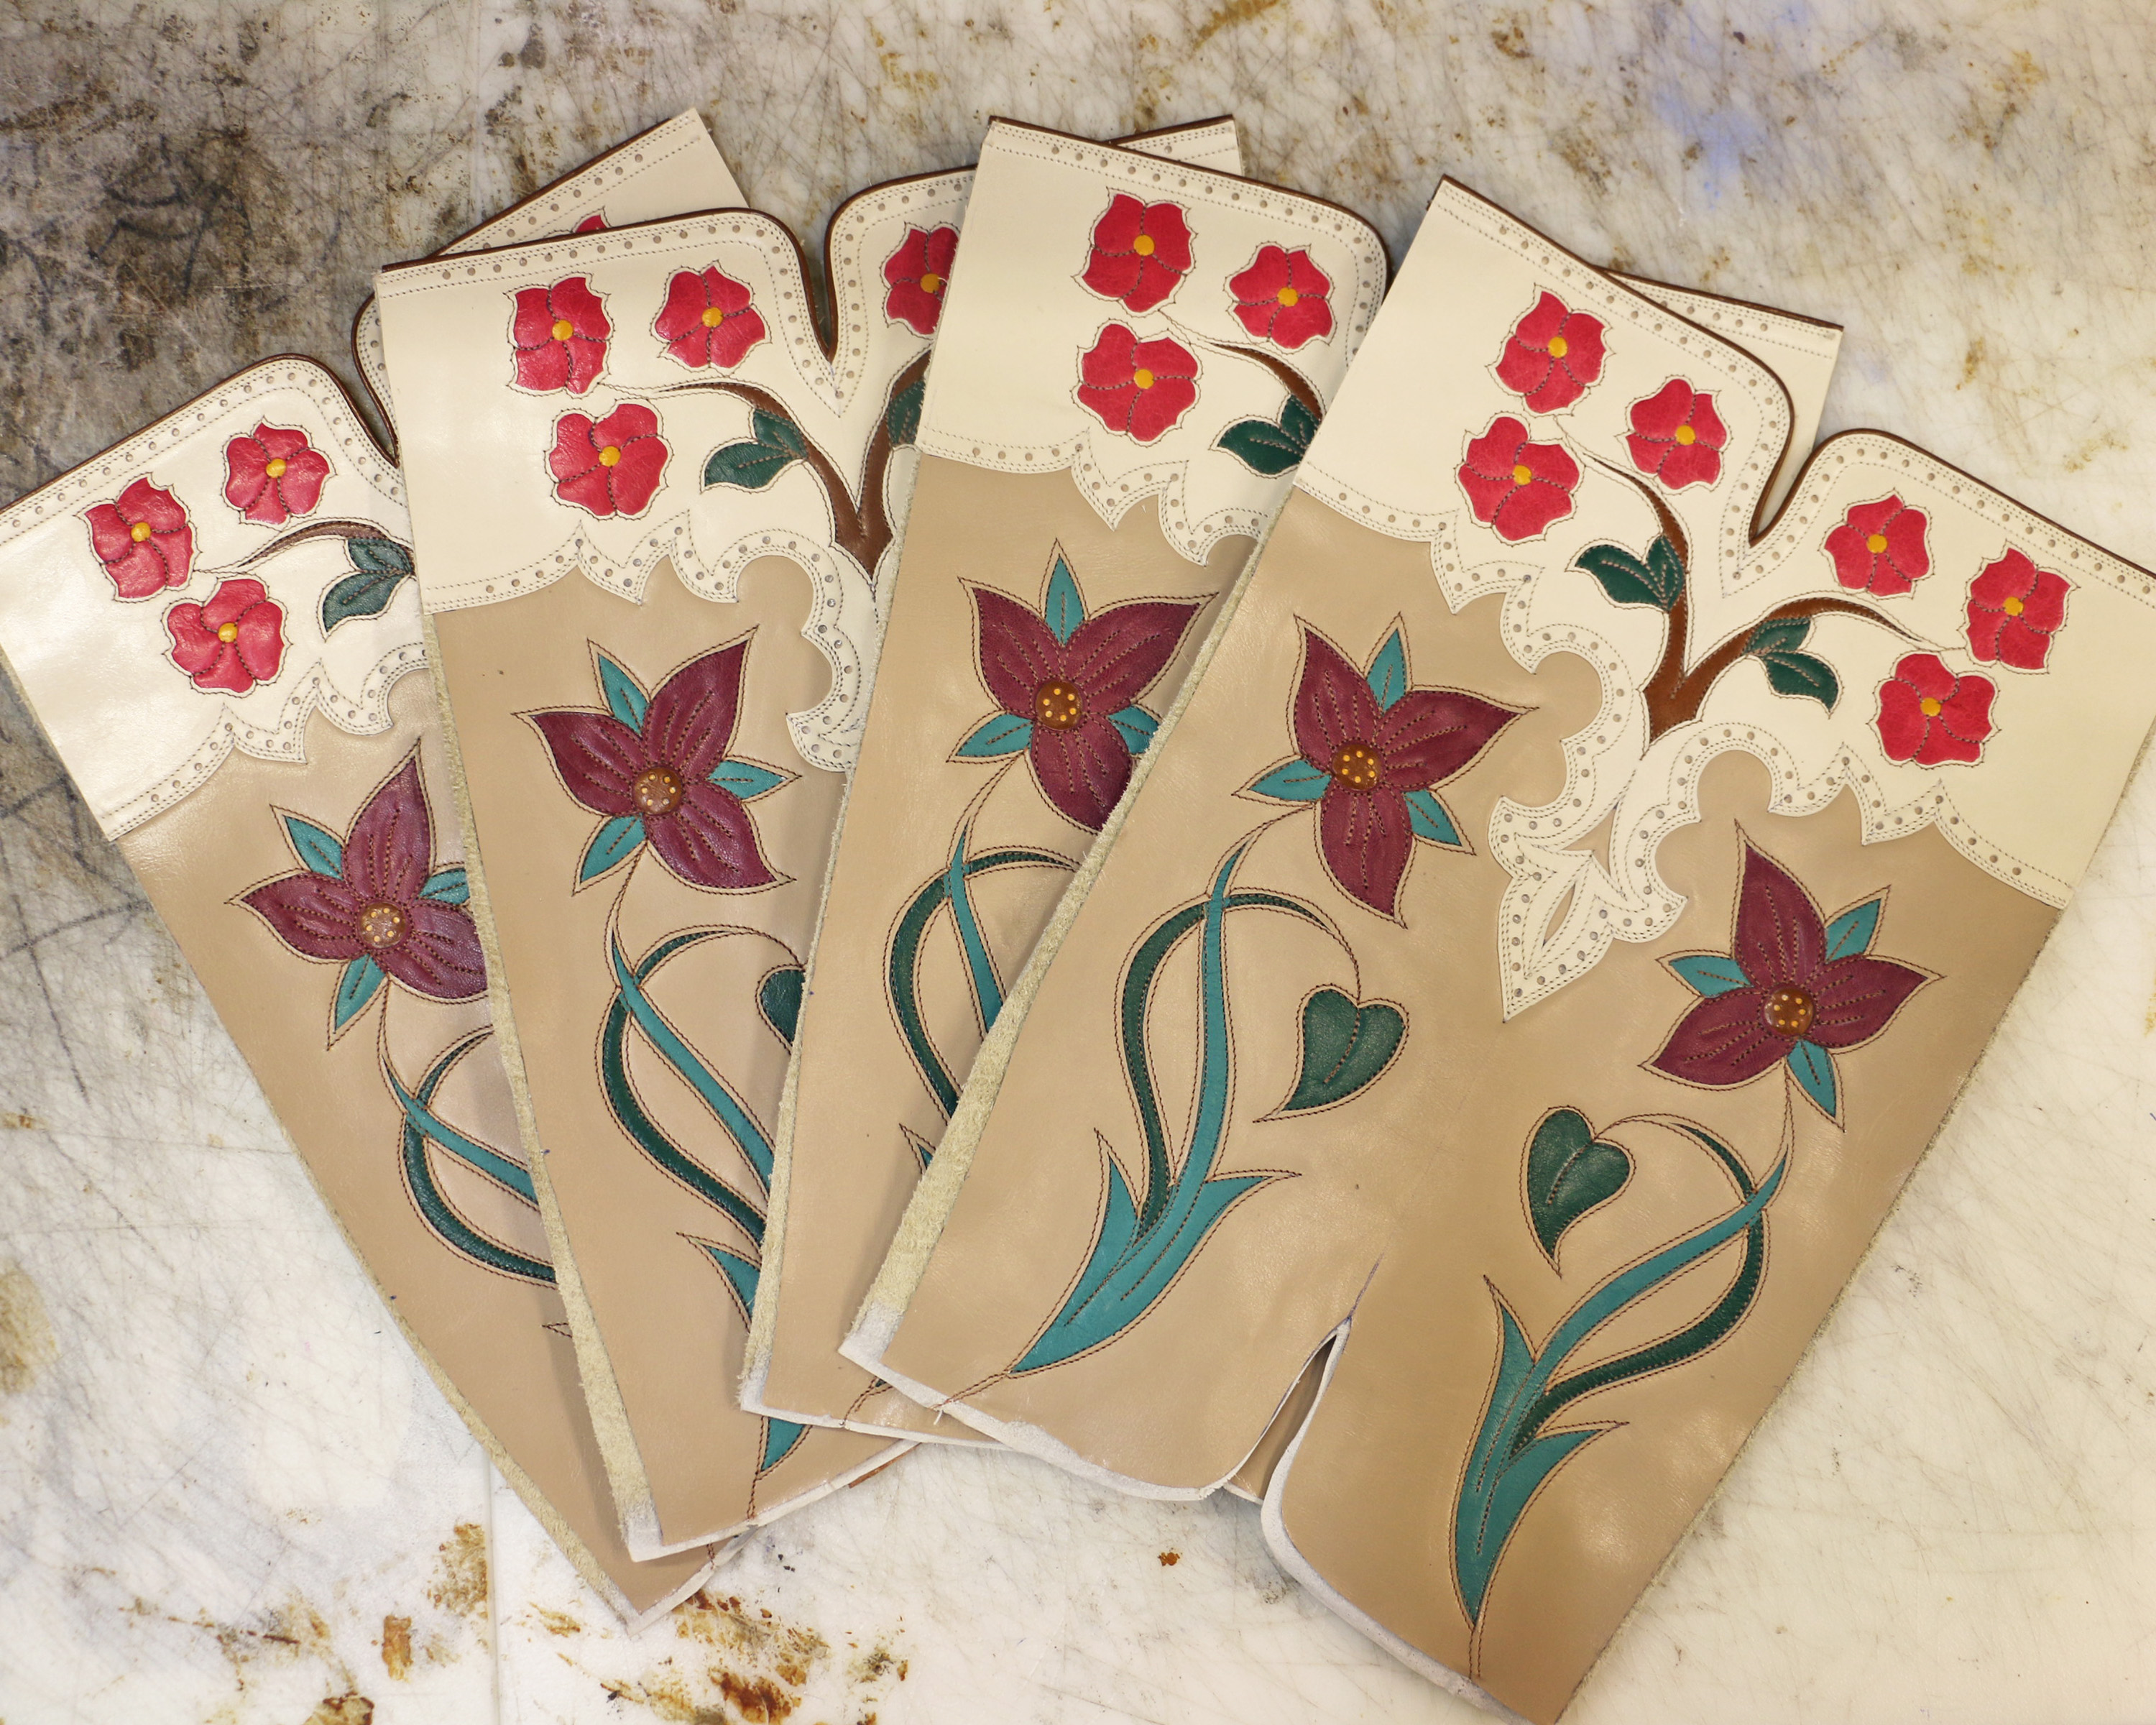
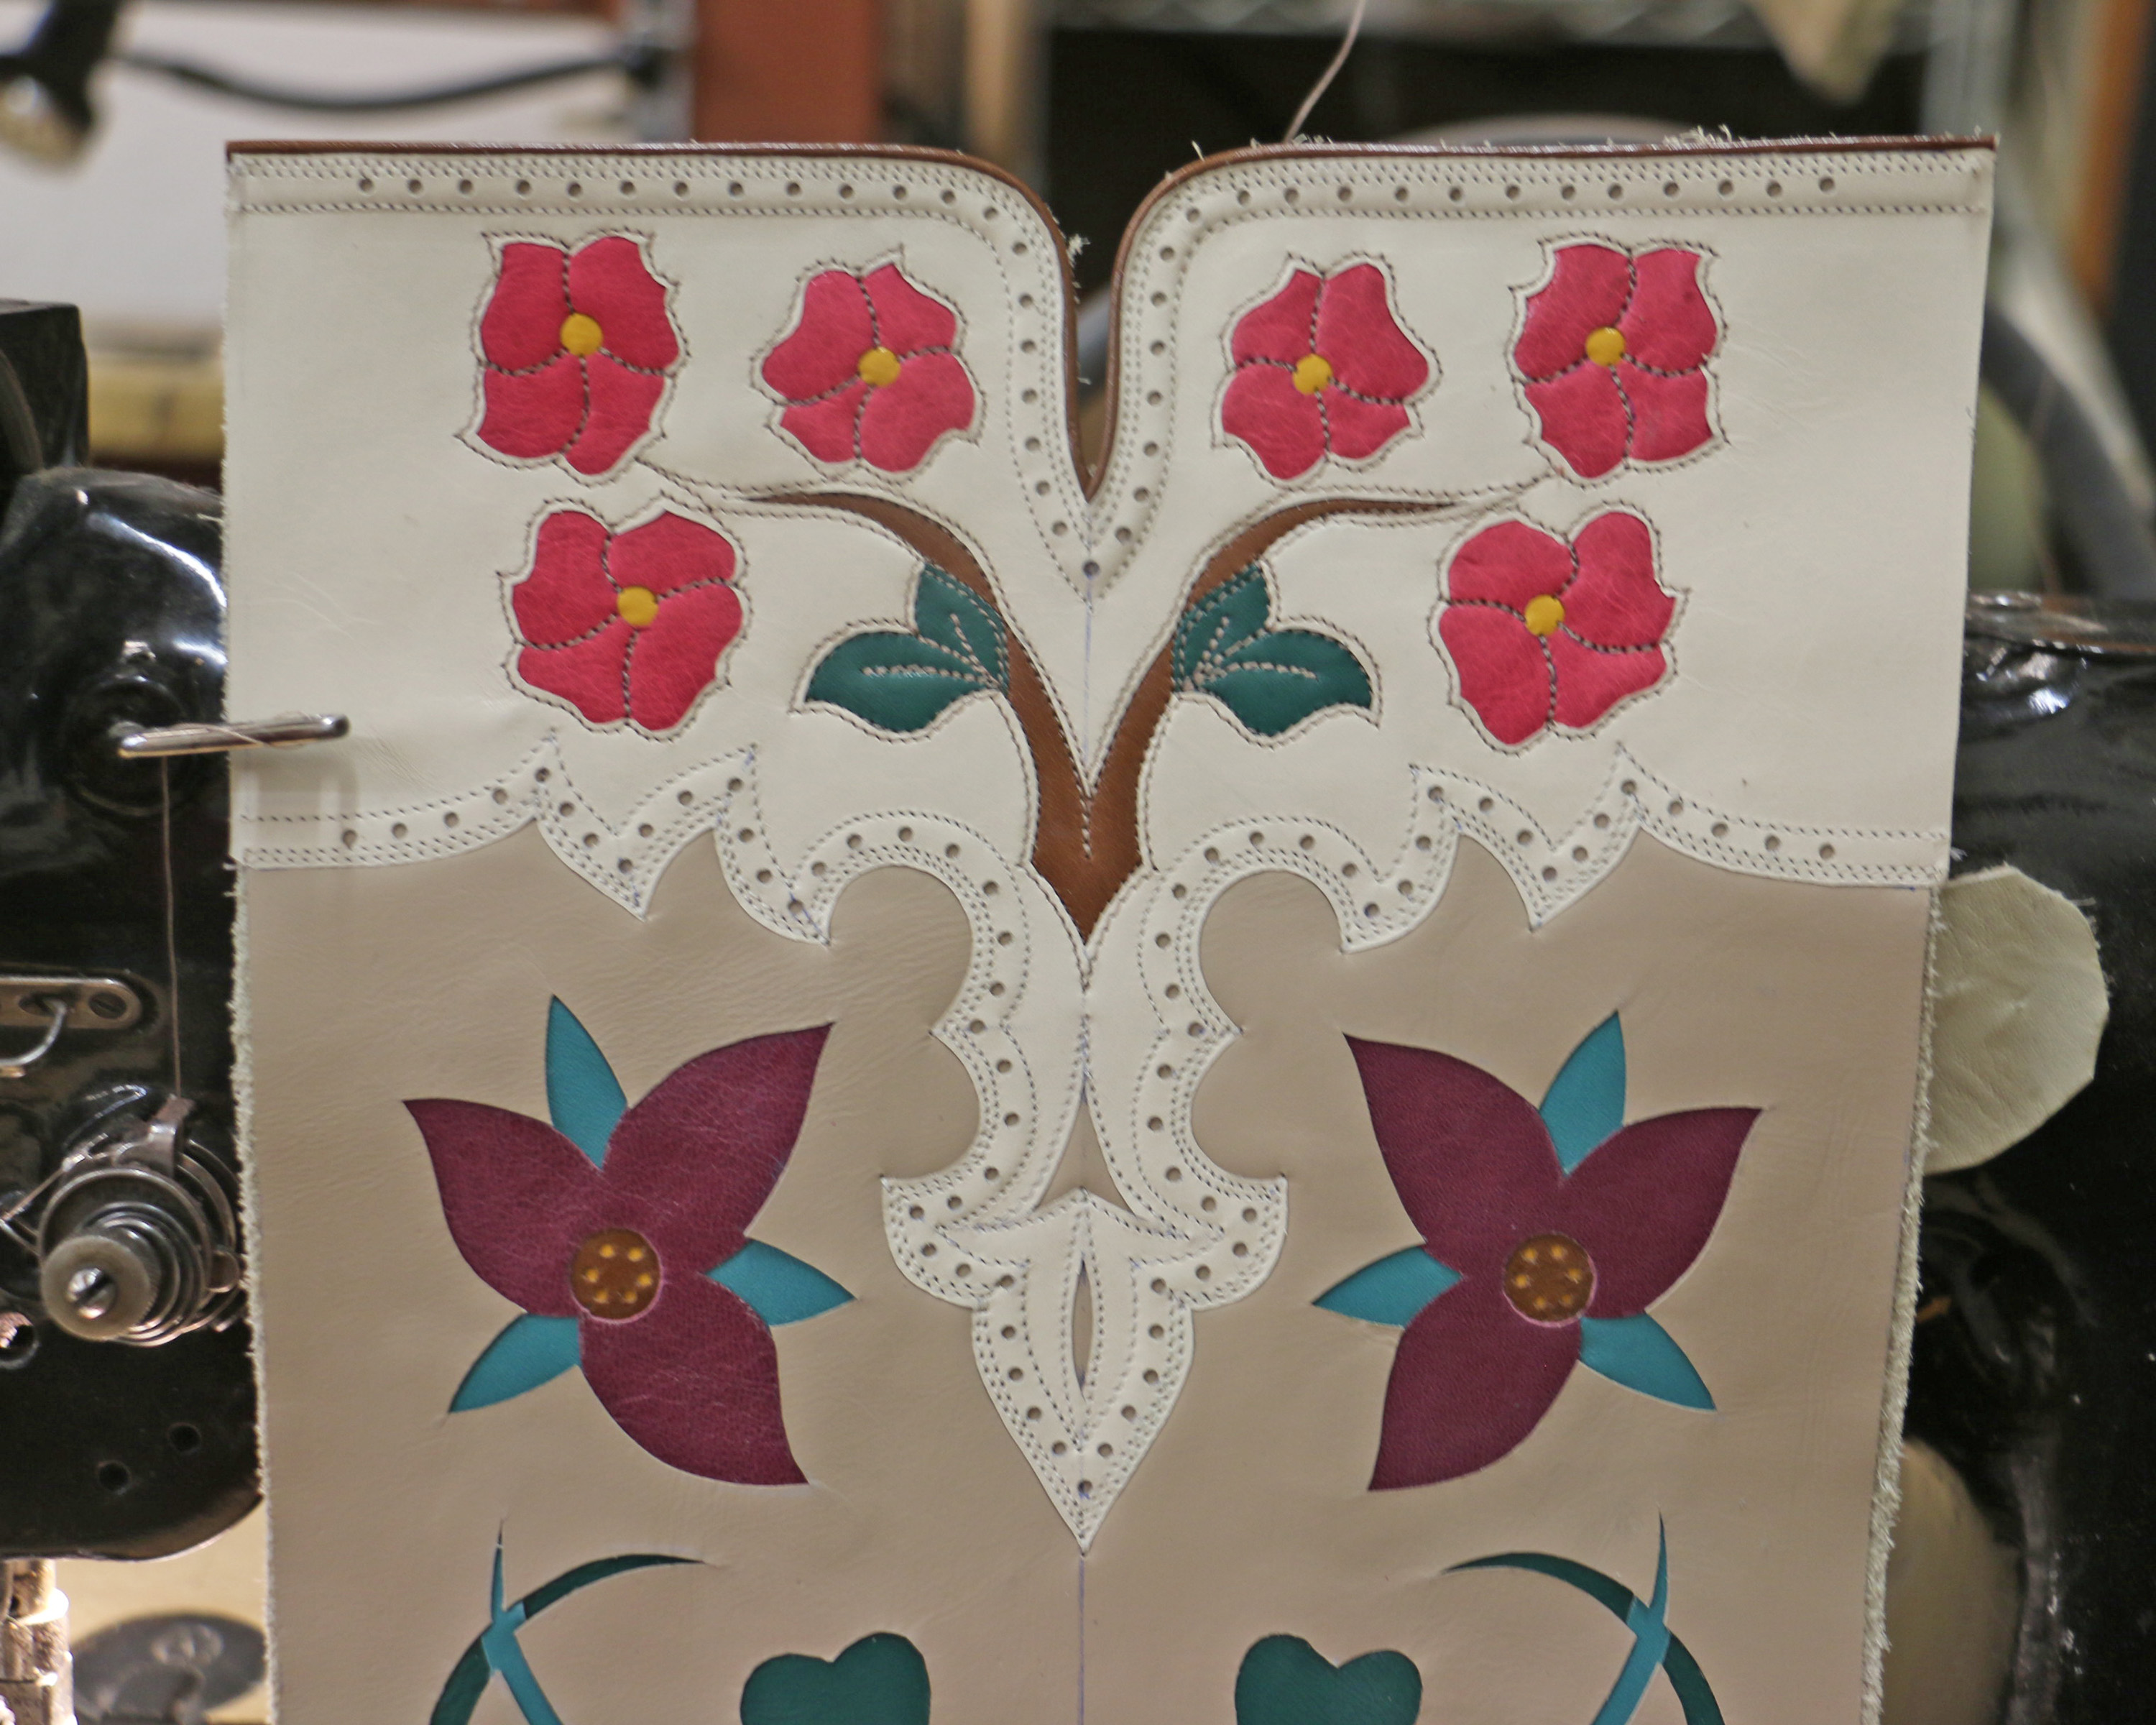
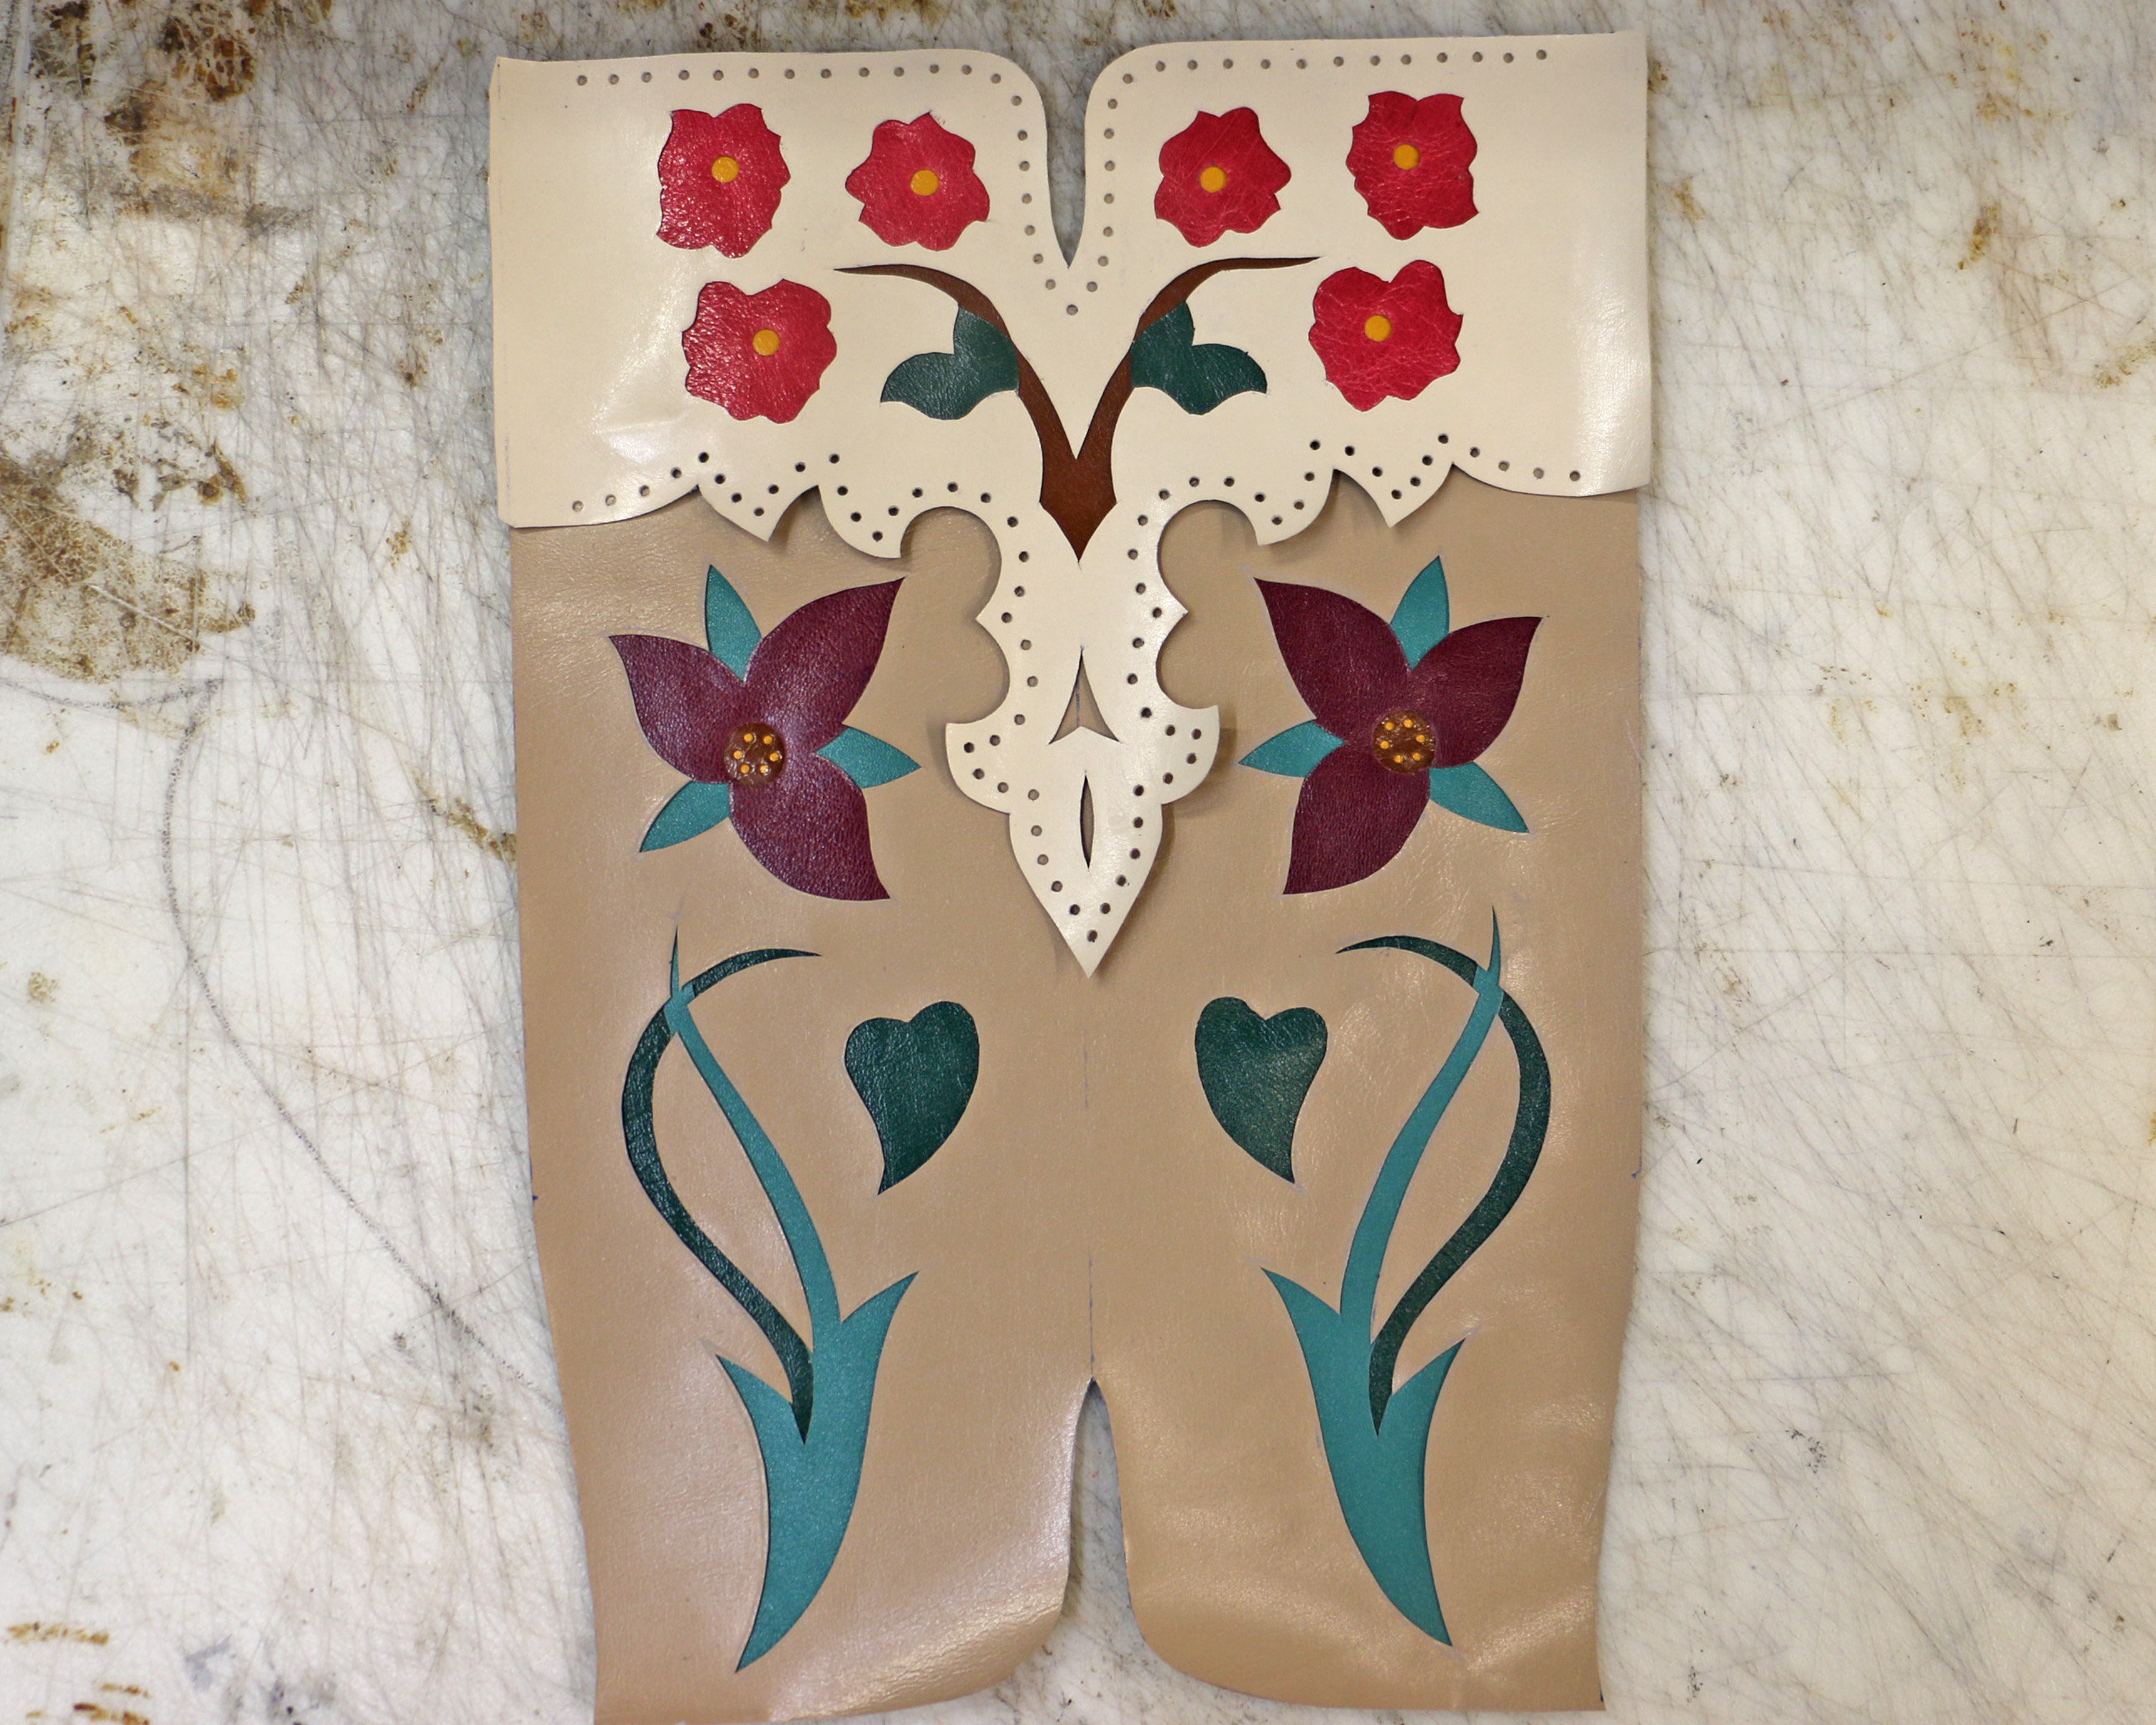
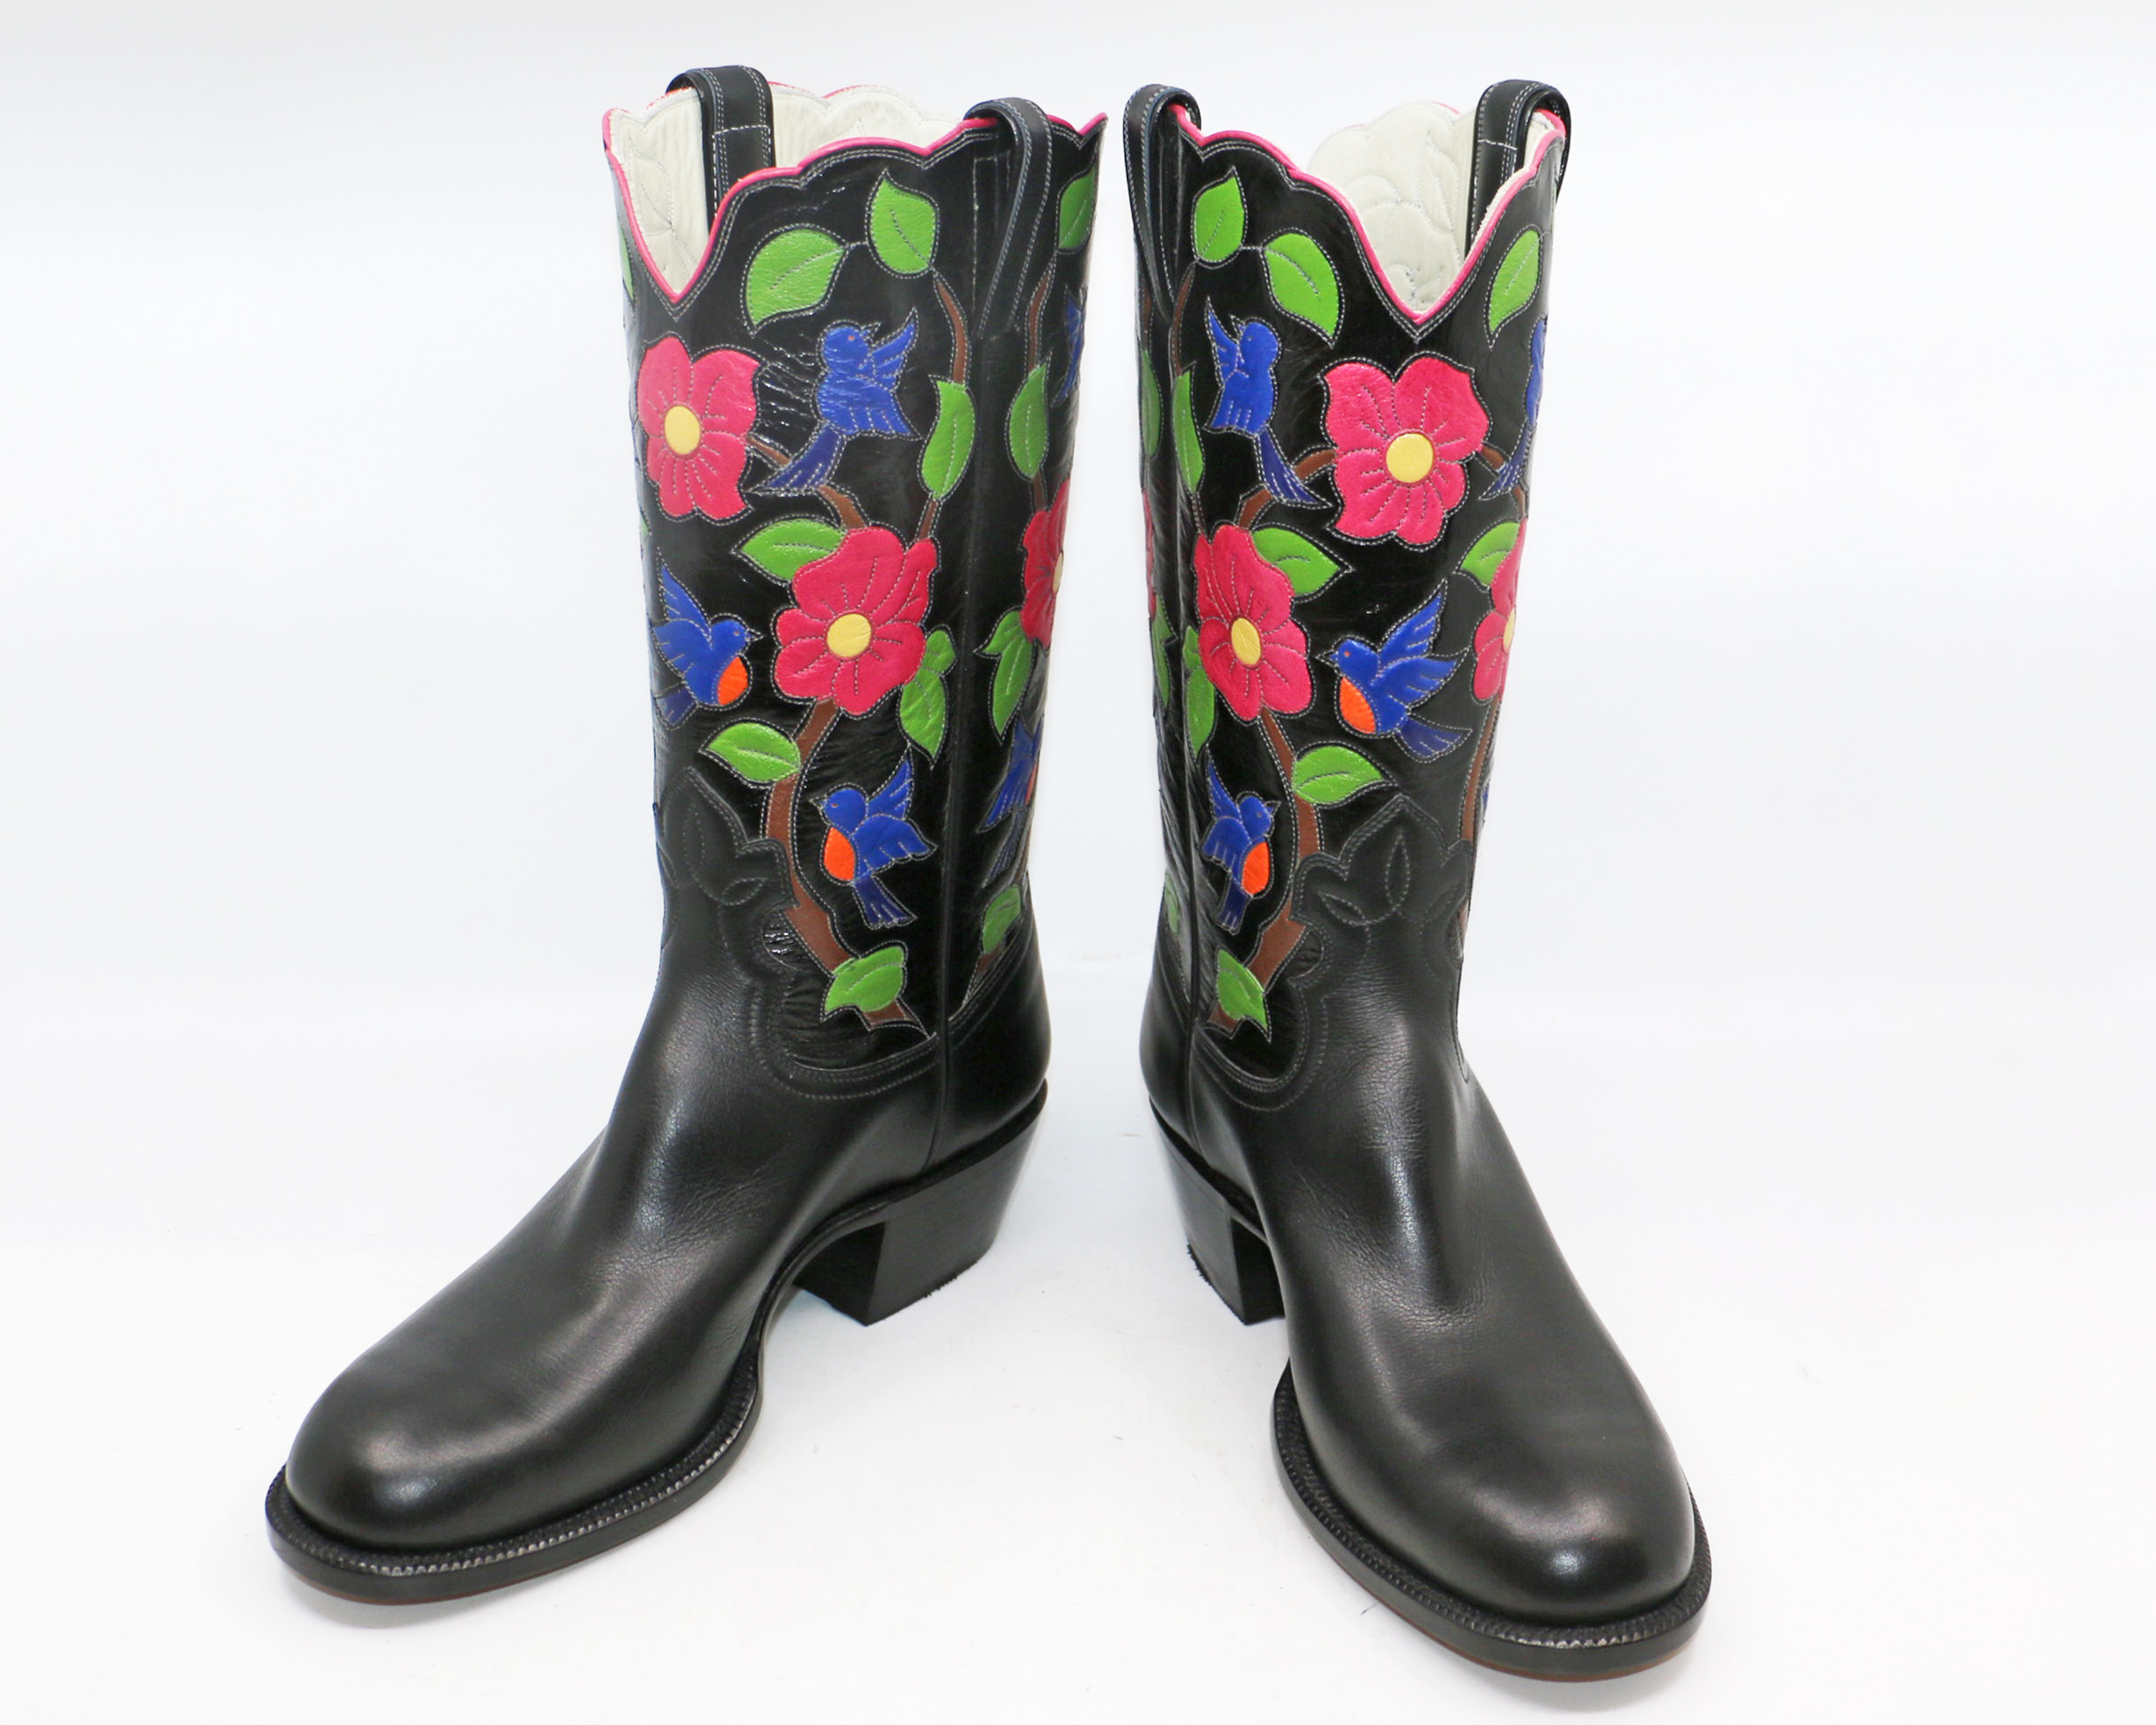
A traditional cowboy boot is a four piece construction: the front top panel, the back top panel, the foot (called the vamp), and the counter (sturdy, heavy leather heel, covered by the visible part called the counter cover). Boot tops, where the decorative work is, are called exactly that — boot tops, not shafts. And now that you know the terminology, I can announce that the boot tops for this pair are completed!
I finished the Wake Robin flowers on the boot tops, took a quick photo with the band laid over the boot top so I could see how they look together, and cut out the little intertwining bands for the toe and heel.
The boots were made for singer/songwriter Joe Newberry and they’re named for one of his original compositions. Here’s a link if you’d like to listen: https://www.youtube.com/watch?v=UT46OSBgCo8
The final step in making a pair of cowboy boots is building and shaping the heels. I breathed a whole lot of leather dust when I was young and invincible. I try not to do that anymore.
The heels are rough-shaped here. I verified that they were both level, the same height, and had the same angle, and then I went home.
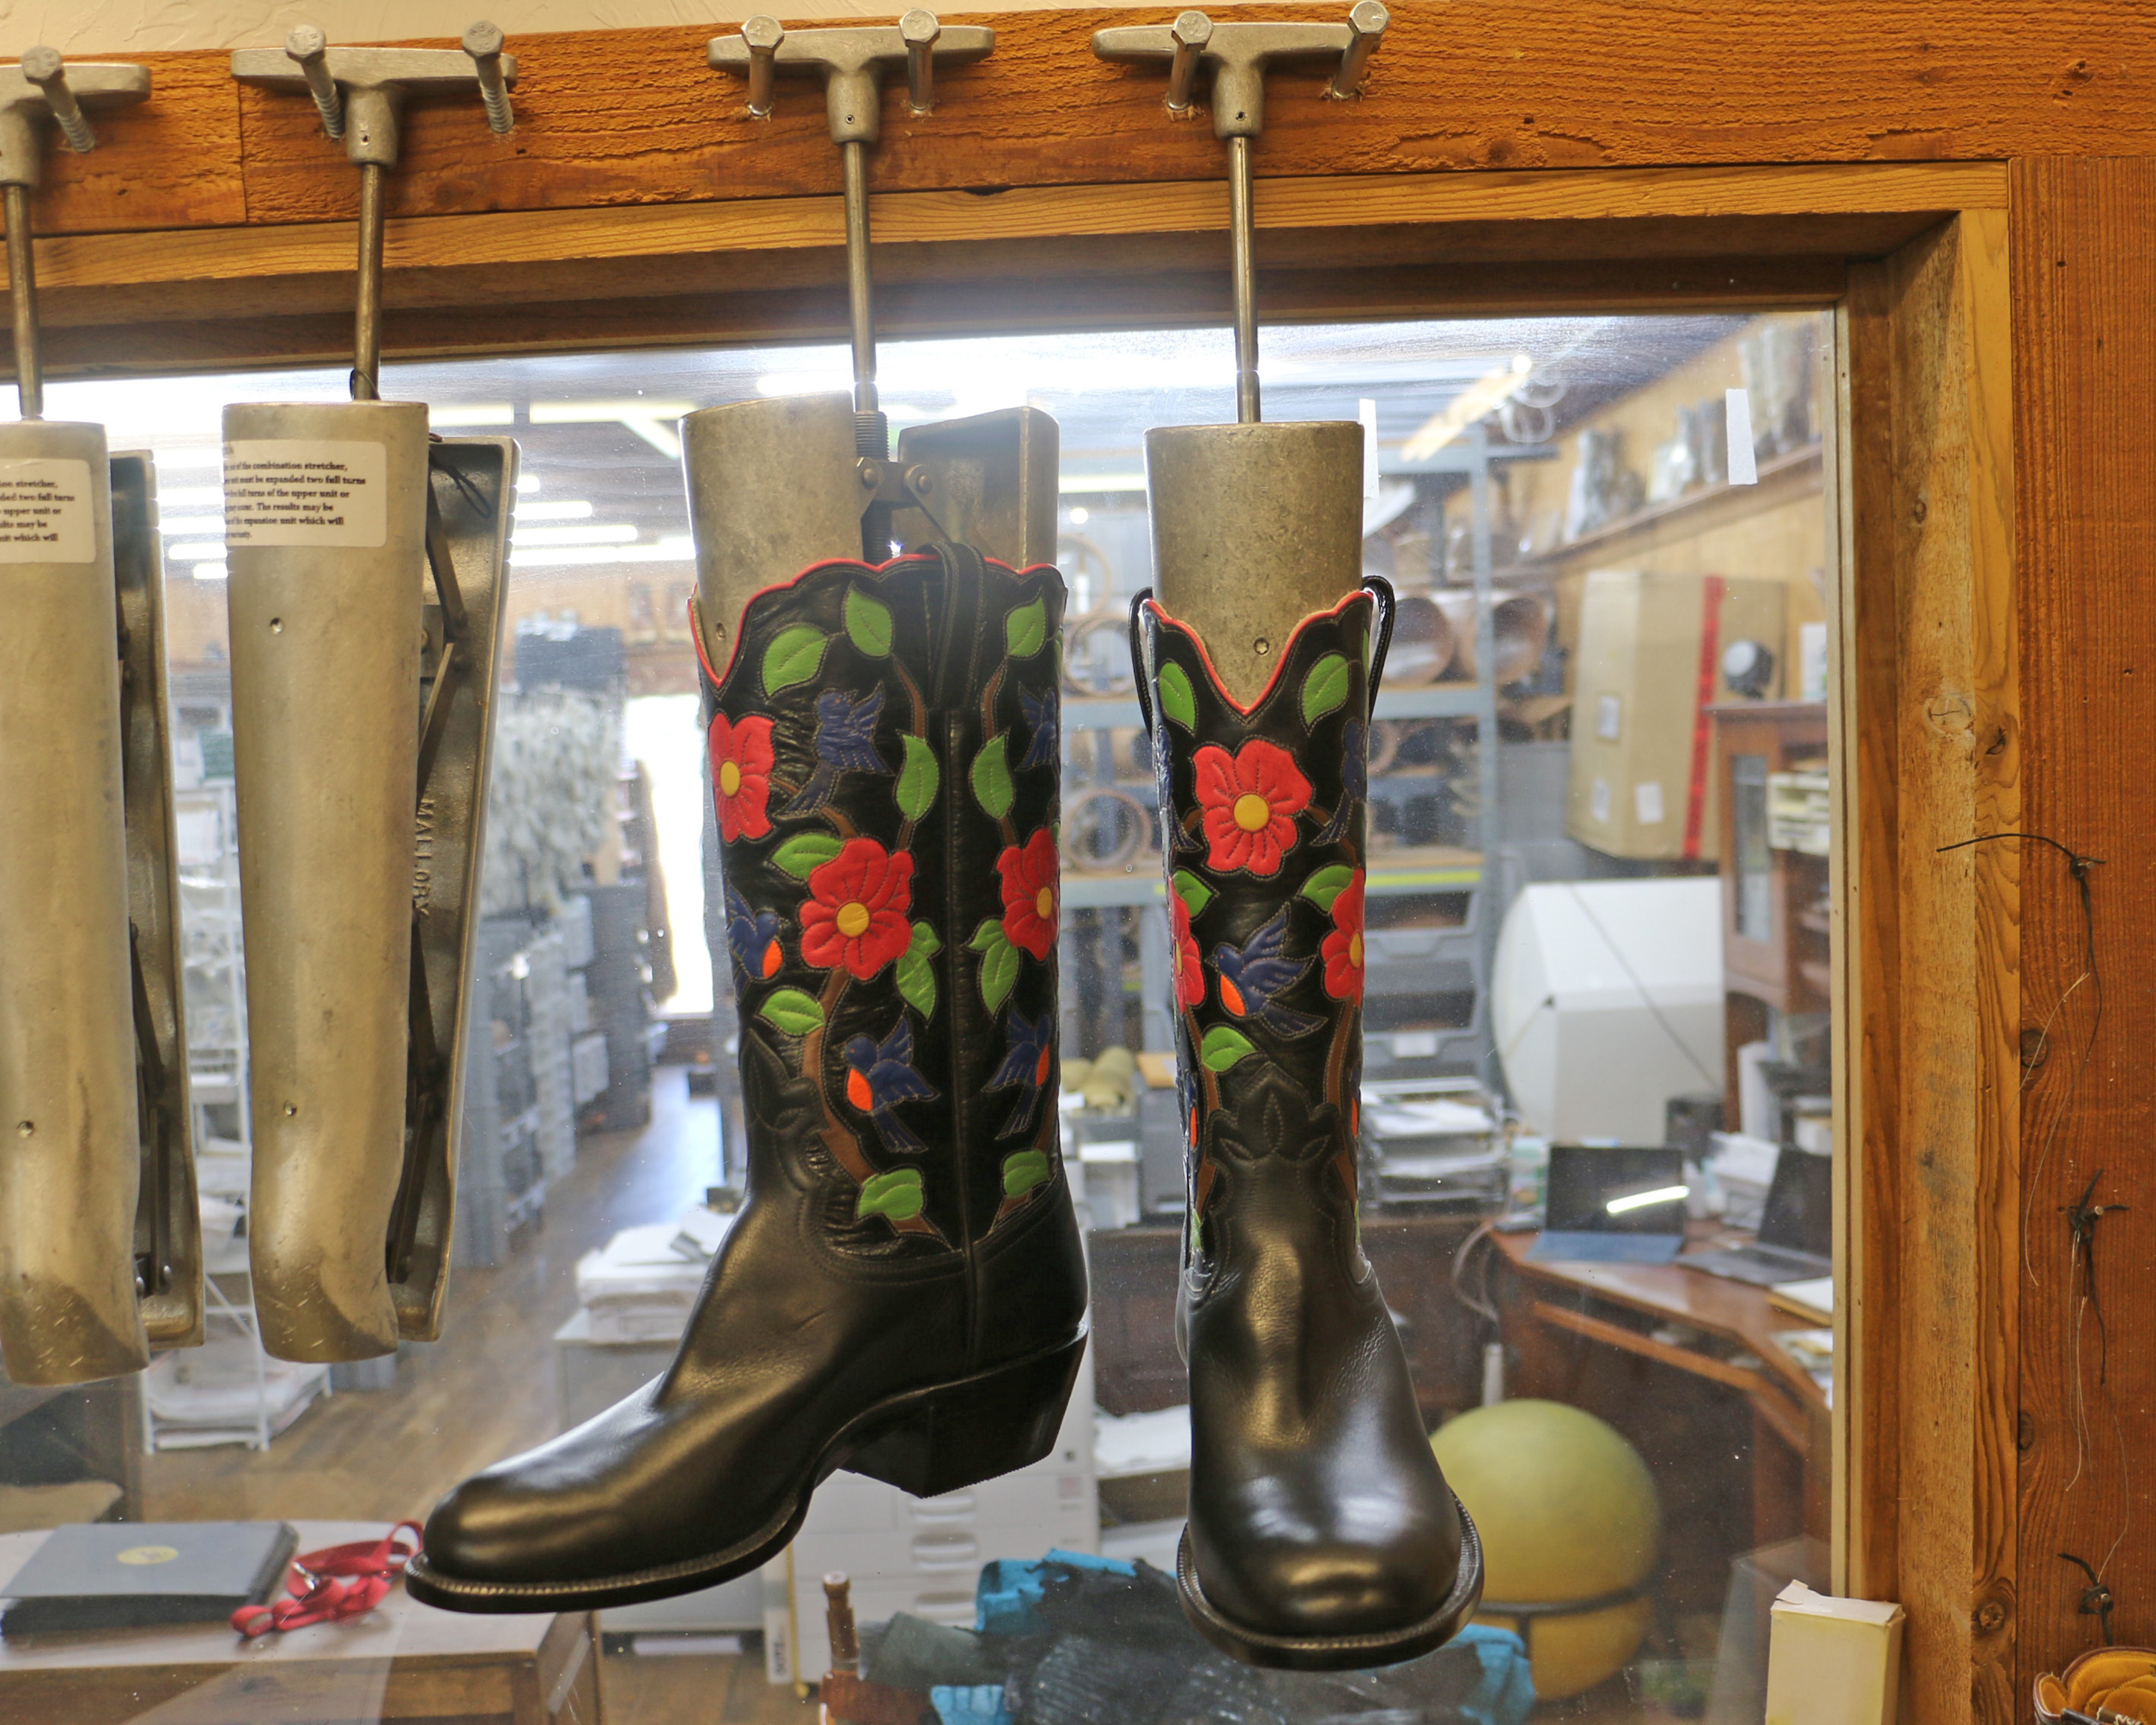
Pro Tip: When you tree a pair of finished boots, always hang the trees; never leave them standing in the boots. The weight of the tree will cause the instep to collapse and fall forward if they’re not hanging, and once that wrinkle is in the boots will always fall forward with an ugly wrinkle.